


EPSON AcuLaser C1100 Revision B
DISASSEMBLY AND ASSEMBLY DUPLEX 426
4.12.11 ROLLER ASSY INVERTER
REMOVAL
1. Remove DUPLEX ASSY. (p.412)
2. Remove COVER-R DUP. (p.413)
3. Remove COVER-L DUP. (p.414)
4. Remove LINK-LATCH and LINK-BUTTON. (p.416)
5. Remove CHUTE ASSY-INV LOW. (p.427)
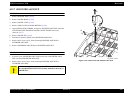
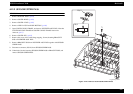
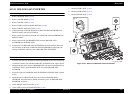
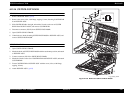
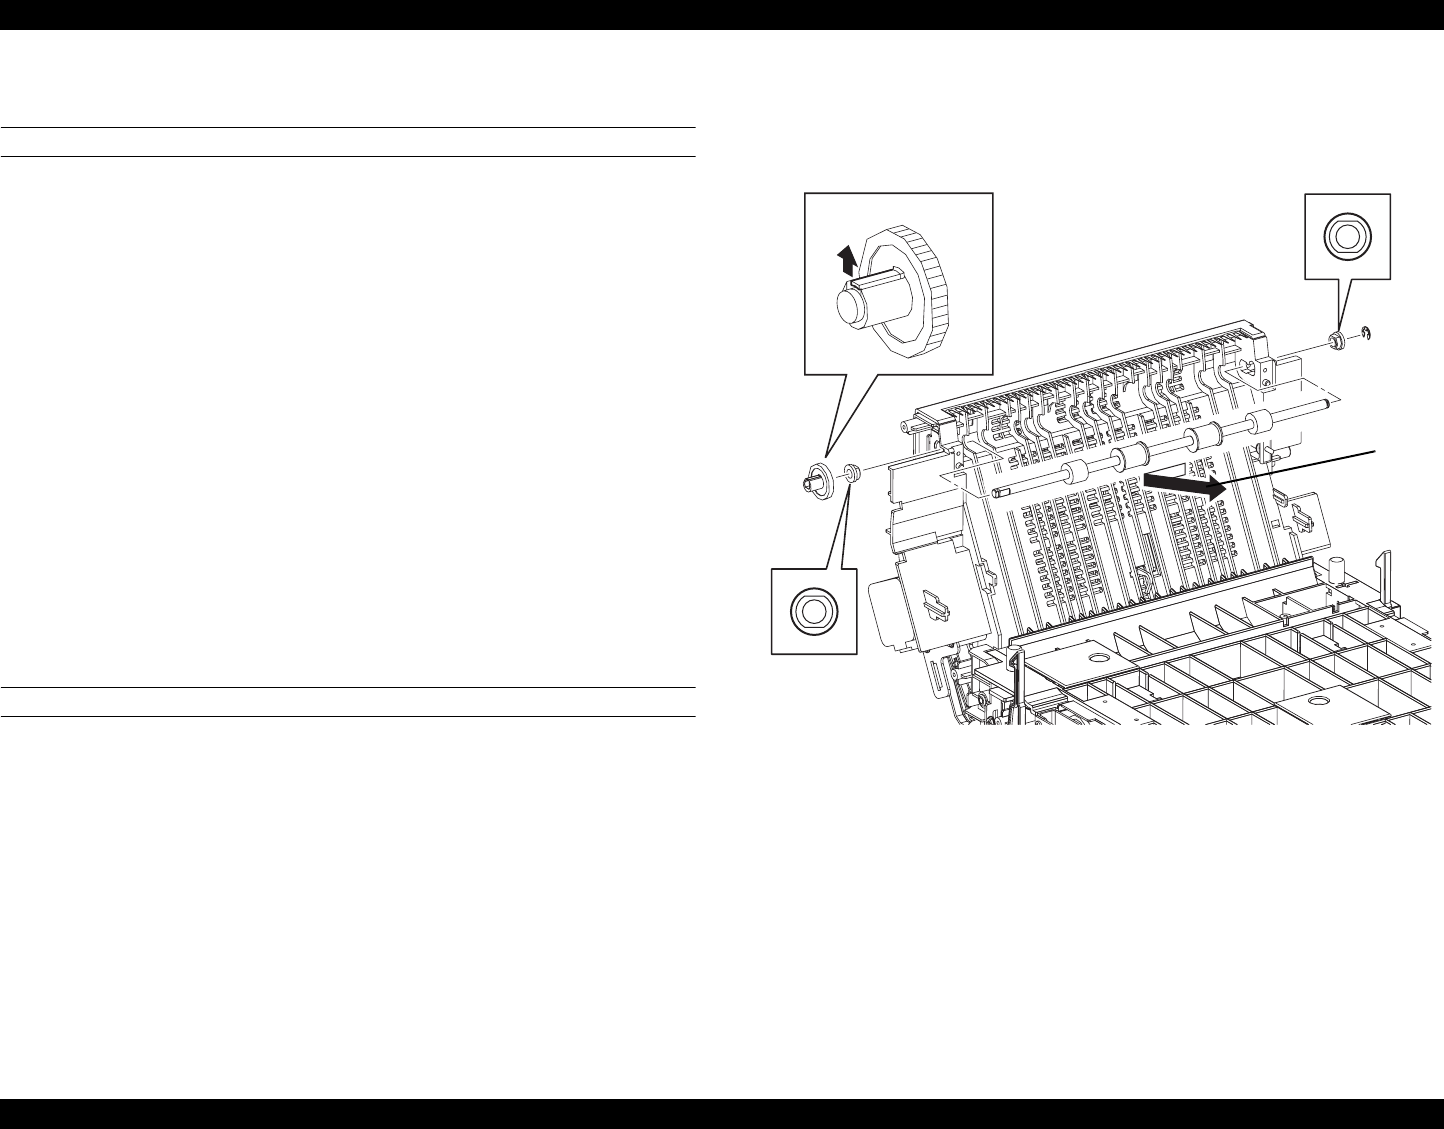
6. Unhook the hook on GEAR 30 fastened to ROLLER ASSY INVERTER from
DUPLEX ASSY, and remove GEAR 30.
7. Remove the E-ring fastening the right side of ROLLER ASSY INVERTER from
DUPLEX ASSY.
8. Remove the left and right BEARING DUP fastening ROLLER ASSY
INVERTER from DUPLEX ASSY.
9. Temporarily slide ROLLER ASSY INVERTER to the front and then slide to the
left, and draw out the shaft of ROLLER ASSY INVERTER from the right-side
bearing of DUPLEX ASSY to remove ROLLER ASSY INVERTER.
REINSTALLATION
1. Insert the shaft left side on ROLLER ASSY INVERTER into the left-side bearing
on DUPLEX ASSY, and slide ROLLER ASSY INVERTER to the right to attach.
2. Match the double D cut surface of BEARING DUP with the left and right bearings
of DUPLEX ASSY, attach BEARING DUP, and fasten ROLLER ASSY
INVERTER.
3. Fasten the right side of ROLLER ASSY INVERTER to DUPLEX ASSY with the
E-ring.
4. Match the hole on GEAR 30 with the D cut surface on ROLLER ASSY
INVERTER, fasten the hook on GEAR 30 with the groove on ROLLER ASSY
INVERTER, and attach.
5. Attach CHUTE ASSY-INV LOW. (p.427)
6. Attach LINK-LATCH and LINK-BUTTON. (p.416)
7. Attach COVER-L DUP. (p.414)
8. Attach COVER-R DUP. (p.413)
9. Attach DUPLEX ASSY. (p.412)
Figure 4-126. Removal of ROLLER ASSY INVERTER
Leg_Sec03_126FA
8)
8)
7)
9)
6)-1
6)-2