


To replace an ink cartridge, follow these steps.
1. Make sure the printer is on. Determine which cartridge
needs to be replaced as indicated by the
black or color
ink out light.
Note:
If you need to replace an ink cartridge when the
and ink out
lights are off, see page 6-28.
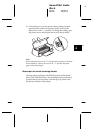
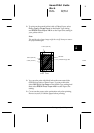
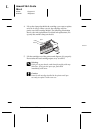
2. Make sure the printer is paused and the output tray at the
front of the printer is lowered; then open the printer cover.
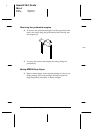
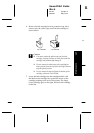
3. Hold down the
cleaning button for three seconds until
the
print head moves left slightly to the cartridge replacement
position, and the
power light flashes when the print
head is in position.
Note:
❑
The printer automatically moves the print head back to its
home (far right) position after about 60 seconds if you have
not started the replacement procedure.
❑
If you hold down the cleaning button when both and
ink out lights are off, the printer starts cleaning the print
head.
c
Caution:
Do not move the print head by hand. Always use the
cleaning button to move it. Otherwise you may damage
the printer.
5
Maintenance
R
Hawaii2 Ref. Guide
Rev.b
A5 size Chapter 5
06-02-97 DR, pass 0
Maintenance and Transportation
5-3