


Custom Printing
2-34
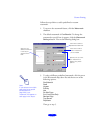
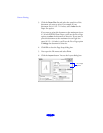
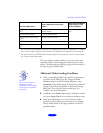
3. Now select the way you want the watermark to appear by
choosing the following options. The Layout graphic
changes to reflect all the settings you choose.
◗
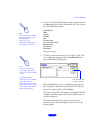
Color
lets you choose a color for your predefined
watermark:
Red
,
Black
,
Blue
,
Aqua
,
Lime
,
Fuchsia
,
or
Yellow
. You cannot select a color for custom
watermarks; they are the same color as the original
PICT file.
◗
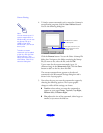
Intensity
sets the lightness or darkness of the
watermark (from 5% to 100%) based on where you
move the slidebar.
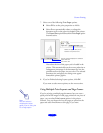
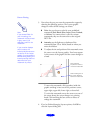
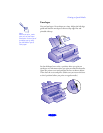
◗ To adjust the size and position of the watermark, move
the cursor over the Layout graphic. Four boxes appear
in the corners of the graphic and the cursor changes to
a hand.
To move the watermark, click anywhere inside the
graphic and drag it into one of five positions: center,
upper-right, upper-left, lower-right, or lower-left.
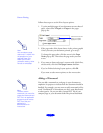
To resize the watermark, move the cursor over one of
the corner boxes; the cursor changes to a pointing
hand. Click and drag the box corner to reduce or
enlarge the watermark.
4. If you’re finished changing Layout options, click
OK to
close the Layout dialog box.
Note:
If you choose Black for
your Ink setting, the
watermark will be printed
in gray, even if you
selected a color for the
watermark.
If your monitor displays
only 16 colors, the
Intensity adjustments are
not shown in the Layout
graphic. If you choose the
No Halftoning setting, the
Intensity setting does not
determine how your
watermark is printed.
Click and drag
anywhere in here to
move the watermark
Click and drag one of
the corner boxes to
resize the watermark