


6-5
Matrix 12800 Switchers • Upgrades and Maintenance
PRELIMINARY
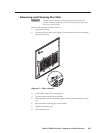
PRIMAR
Y A
REDUND
ANT A
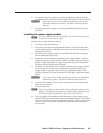
ON = GOOD
OFF = FAILED
2 LED's:
ON = GOOD
OFF = FAILED
2 LED's:
PRIMARY B
REDUND
ANT B
ON = GOOD
OFF = FAILED
2 LED's:
ON = GOOD
OFF = FAILED
2 LED's:
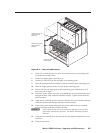
CONT
POWER SUPPLY B
POWER SUPPLY A
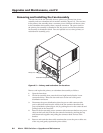
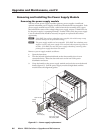
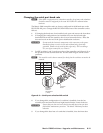
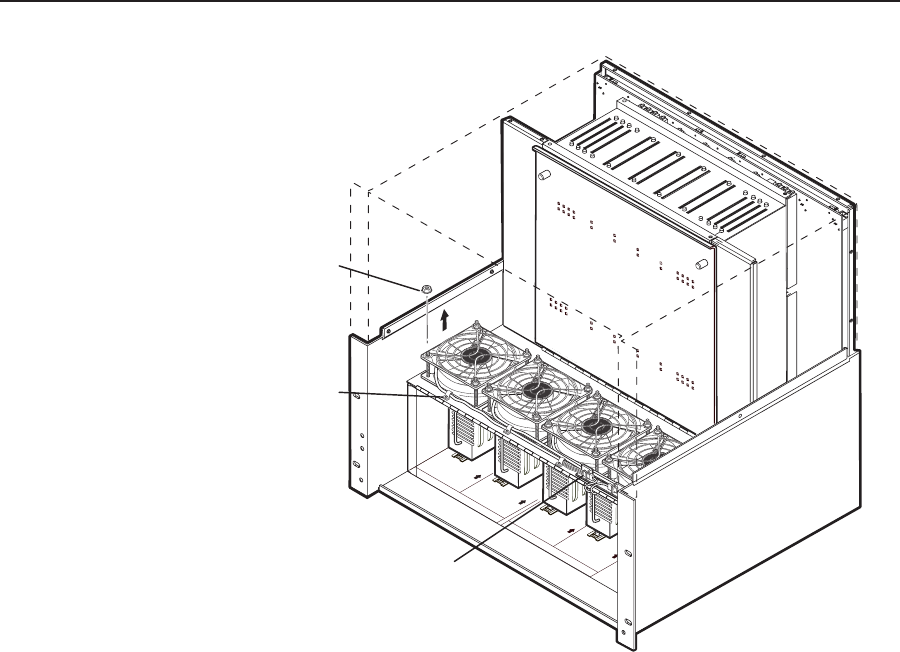
Remove four nuts w/
captive washers
(each fan).
Remove screws from
cable hold down
brackets.
Disconnect fans
at connectors.
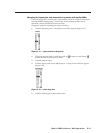
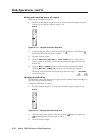
Figure 6-4 — Fan pair replacement
6. Using a 5/16-inch nut driver, remove and retain the four nuts securing each
fan to the fan assembly door.
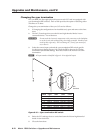
7. Lift the two finger grates out of the way.
8. Lift the two fans off of the fan assembly door retaining posts.
9. Place the replacement fan assembly on the fan assembly door retaining posts.
10. Place the finger grates over the two fans on the retaining posts.
11. Secure each fan and finger grate to the restraining posts with the four 5/16"
nuts removed in step 6.
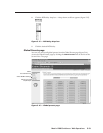
12. Secure the power cables out of the way, behind the fan connector bracket and
through the three cable restraints retained in step 5. Tighten down the three
cable restraints.
13. Align the fan assembly power connector with the slot on the outside of the fan
connector bracket and snap the connector into the bracket.
14. Connect the power distribution plane fan power cable to the fan assembly
power connector in the fan connector bracket.
C
Ensure that you close and secure the fan assembly door when you have
finished this maintenance procedure. The Matrix 12800 may overheat
otherwise.
15. Close the fan assembly door and turn the left and right knurled knobs ¼-turn
clockwise.
16. Close the front door.