


Mounting
IPI 100 and IPI 200 Series • Mounting
C-2
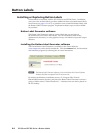
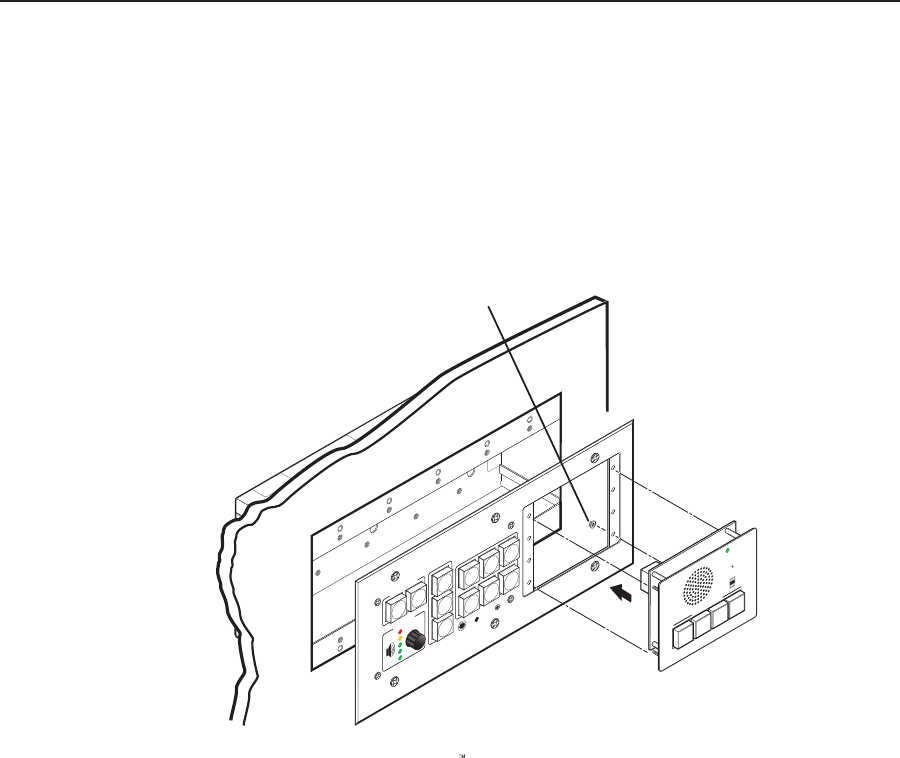
Mounting the IPI 100 Series
The IPI intercom and any other adapter plates must be attached to a device
faceplate or AAP wall plate and cabled before the device or wall plate is installed in
a wall or furniture. The screws needed for installing the IPI are built into its front
panel.
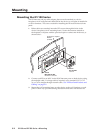
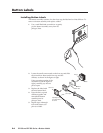
1.
Beforecablesareattached,inserttheIPI’sscrewsthroughtheholesinthe
device’sfaceplateorAAPmountingframe.Securetheintercommoduleto
thefaceplate/wallplatewiththeprovidedcaptivewashersand#4‑40nuts,as
shown below:
Extron
PROJEC
TOR
MLC 226 IP AAP
1
2
3
4
5
6
VOLUME
CONFIG
IR
PC
AUX
VIDEO
DVD
VCR
DOC
CAM
LAPT
OP
AUTO
IMAGE
MUT
E
ON
OFF
Extron
MLC 226 IP AAP
MediaLink Controller
Extron
IPI 104 AAP
Intercom
#4-40 Nut w/ Captive
Washer
(included)
INTERCO
M
MIC
ON
LEVEL
H
IG
H
M
E
D
LO
W
1
2
3
4
IPI 10
4
PUSH TO TALK
SECURI
TY
LAB
ADMIN
OFFI
CE
HELP
DESK
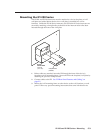
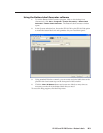
2. ConnecteachIPItoanMLCviatheRJ‑45intercomportsonbothdevicesusing
the included cable. If a longer cable is required, use a standard CAT 5, CAT
5e,orCAT6straightthroughnetworkcable.See“IPIRearPanelFeaturesand
Cabling”onpage2‑2.
3. Mount the AAP mounting frame or other device to the wall, furniture, or rack
panel. Follow any special mounting instructions that came with that device.