CONNECT2AIR™ WLAN AP-600RP-USB Page 11 / 62
4.3 Procedure for Hardware Installation
1. Decide where to place your AccessPoint
You can place your AccessPoint (AP) on a desk or another flat surface or mount it
on a wall. For optimum performance, place it in the center of your office (or your
home) in a location away from any potential source of interference, such as a metal
wall or microwave oven. This location must be close to a wall socket and a network
connection.
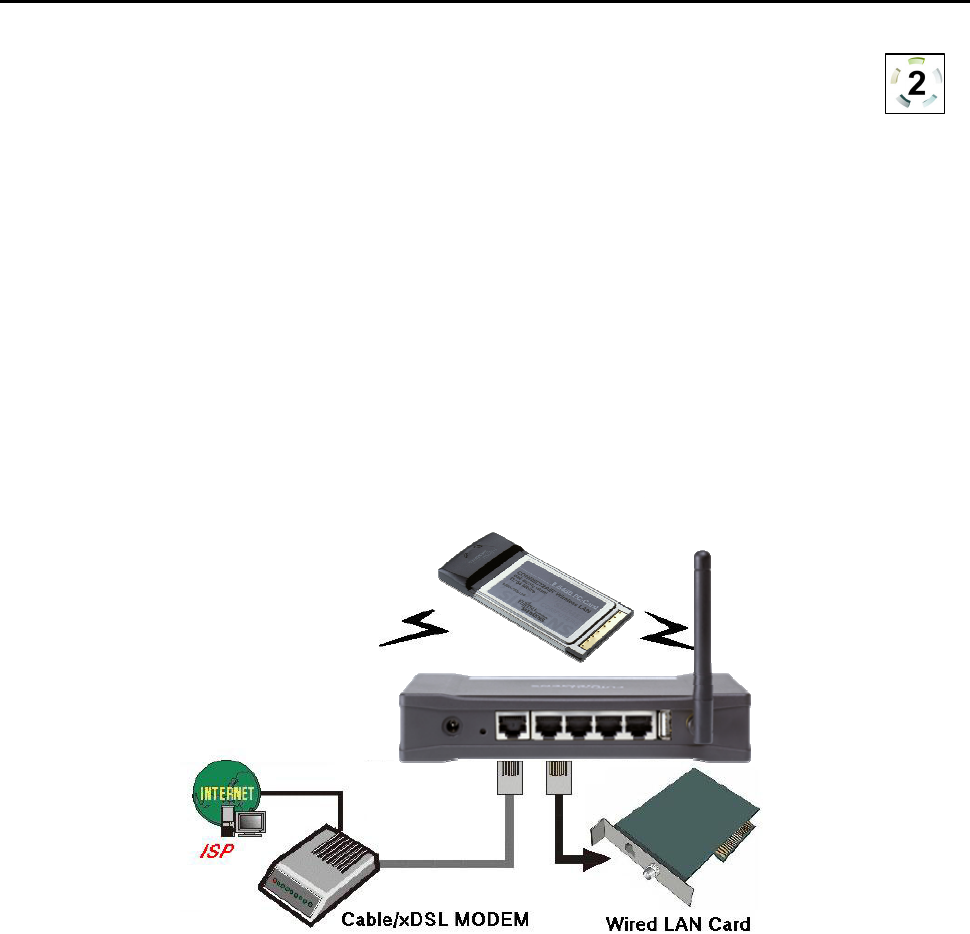
2. Set up a LAN connection
a) Wired LAN connection: Connect an Ethernet cable from your computer’s
Ethernet port to one of the AP’s LAN ports. You can use a standard Ethernet
cable or an Ethernet cross-cable: the AP can automatically detect either.
b) Wireless LAN connection: Move the AP to a proper position to ensure the best
transmission performance.
Figure 4-3 Setup of the AP’s LAN and WAN connections
3. Set up a WAN connection
Prepare an Ethernet cable for connecting the AP to your cable/xDSL modem or
Ethernet backbone. You can use a standard Ethernet cable or an Ethernet cross-
cable: the AP can automatically detect either. Figure 4-3 illustrates the WAN con-
nection.
4. Connect the AccessPoint to your USB printer
Use the printer USB cable to connect your printer to the AP’s USB printer port.
5. Power on
Connect the power adapter to the power socket. Your AccessPoint then will auto-
matically enter the self-test phase. During the self-test, the LAN LEDs will flash. Fi-
nally, the PWR LED will light permanently as the AccessPoint enters normal opera-
tion.


