14
3.3 fi-5000N's Settings and Connecting to the Network
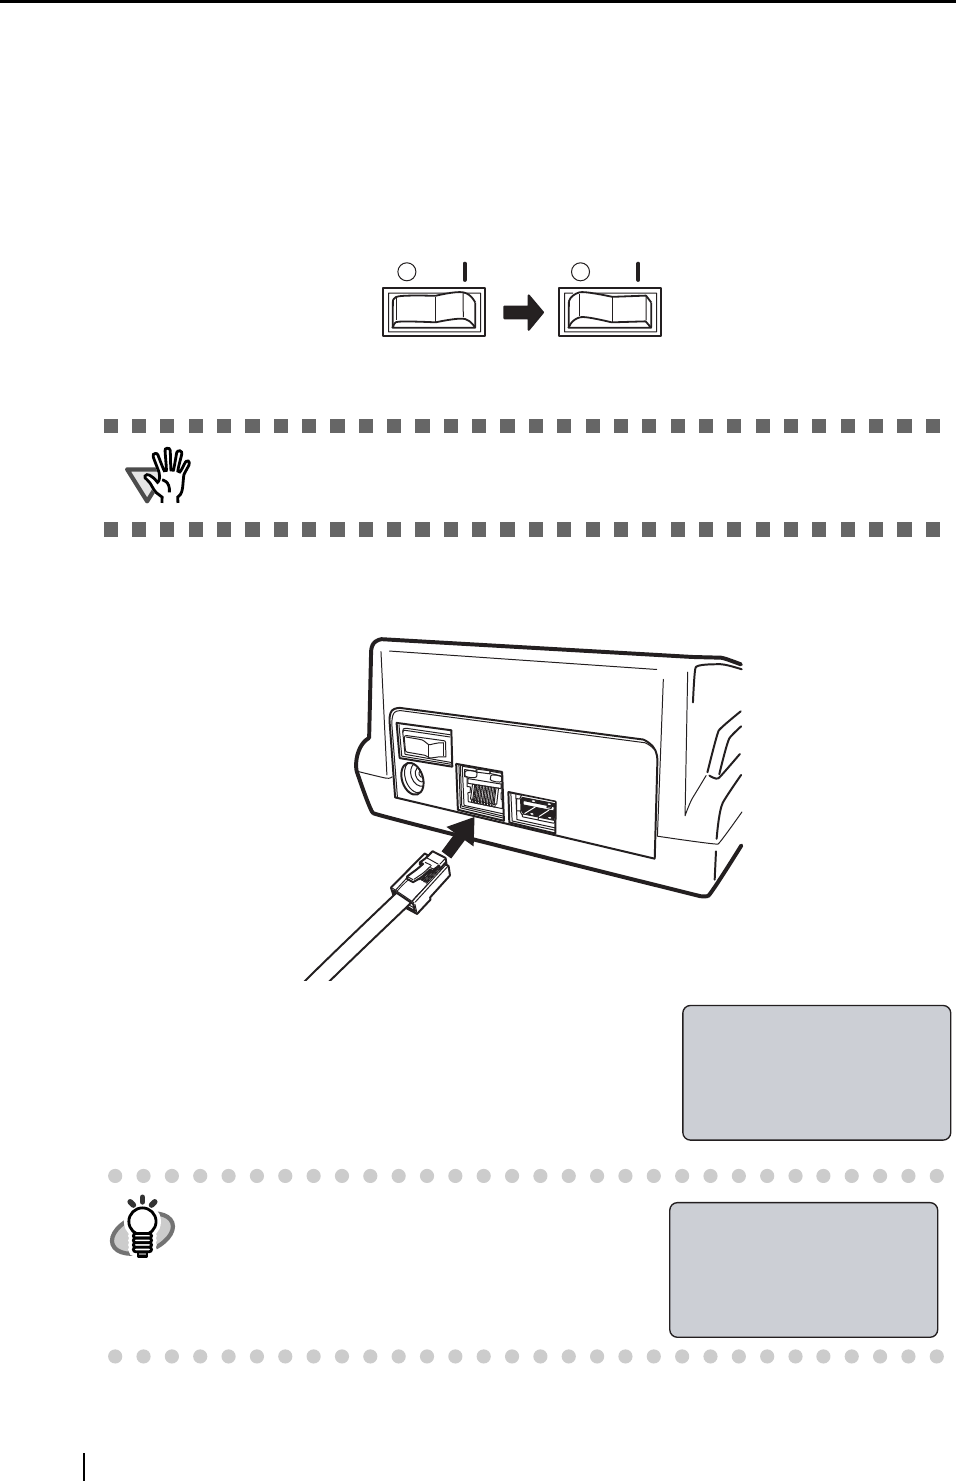
1. Turn on the power of the scanner and fi-5000N.
Refer to the scanner manual for details on turning on the power of the scanner.
Turn on the fi-5000N by pressing the "|" of the power switch located at the back of the fi-
5000N.
2. When "The network cable is disconnected" appears on the fi-5000N’s Message Dis-
play, connect the network cable to the network connector at the back of fi-5000N.
The following screen appears.
If the network support DHCP and the process goes success-
fully, "Place your finger on the sensor." message appears.
ATTENTION
To change the language setting, refer to "3.4 Changing the Language Set-
ting" (page 18)
HINT
When the above screen remains still, open the
cover of the fi-5000N, and press the [ESC]
key.
⇒ The following screen appears, and the IP
address obtaining operation is canceled.
Power OFF Power ON
Obtaining IP address
from DHCP server...
Cancel:[ESC]
Cannot obtain IP
address from DHCP
server.
Setup:[SET]


