CHAPTER 4: Upgrading Your Computer
58
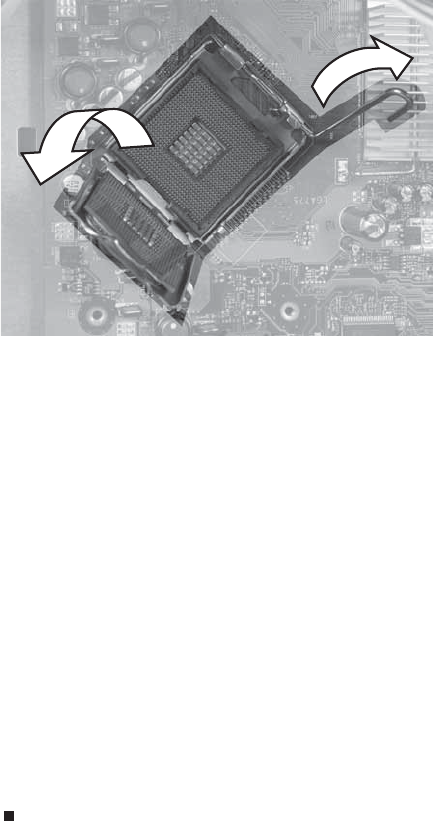
17 Release the processor from the old system board by
pushing down on the lever, then lifting it completely up.
18 Remove the processor from the old system board.
19 Install the processor onto the new system board making
sure that Pin 1 on the processor (indicated by the
silk-screened arrow on the corner of the processor)
aligns with Pin 1 on the processor socket (indicated by
the absence of a pin hole in the processor socket), then
return the lever to its locked position.
20 Place the heat sink over the processor, then tighten the
screws that secure it to the system board.
21 Install the power supply into the case, then install the
three screws to secure the power supply to the case.
22 Connect the power and data cables using your notes
from Step 9.
23 Install the memory you removed previously.
24 Connect the fan cable to the system board, then insert
the fan into place.
25 Reinstall any expansion cards you removed.
26 Replace the side panel by following the instructions in
“Replacing the side panel” on page 33.
8511861.book Page 58 Monday, December 18, 2006 11:20 AM


