


Using the RILOE II 51
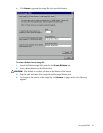
The Virtual Floppy Boot option has three settings:
• Boot Always—This setting instructs the RILOE II to always boot the host server from the diskette
image file in the Virtual Floppy Drive. If this setting is checked, the Virtual Floppy Status screen
shows the virtual drive as active after the server has restarted.
• Boot Once—This setting instructs the RILOE II to boot the host server one time from the diskette
image file in the Virtual Floppy Drive. If this setting is checked, the Virtual Floppy Status screen
shows the virtual drive as active after the server has restarted.
• No Boot—This is the default setting for the Virtual Floppy Drive. It instructs the RILOE II not to boot
the host server from the diskette image file in the Virtual Floppy Drive. This setting has no effect on
the Virtual Floppy Drive status.
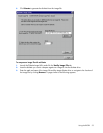
Copying files on the host server to the Virtual Floppy drive
The Write Protect Virtual Floppy option on the Virtual Floppy screen specifies whether data on
the host server can be copied to the Virtual Floppy Drive. If this option is selected, the Virtual Floppy Drive
is write protected and no data from the host server can be copied to it.
To copy remote files to the Virtual Floppy Drive using standard operating system commands typed at the
Remote Console, be sure that the Write Protect Virtual Floppy option is deselected. The Virtual
Floppy option cannot be used to upgrade the RILOE II firmware.
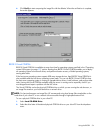
Diskette Image Utility
The Diskette Image Utility has three functions:
• Creating an image file from a standard 1.44-MB diskette suitable for use with the Virtual Floppy
Drive
• Creating a standard 1.44-MB diskette from an image file copied from the Virtual Floppy Drive
• Comparing a diskette image file with a standard 1.44-MB diskette
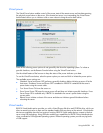
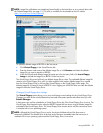
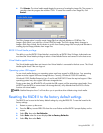
To create an image file from a diskette
1. Launch the Diskette Image Utility and click the Create Image File tab.
2. Insert the diskette you want to make an image of into the diskette drive.
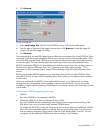
3. Provide the path, the file name of the image, and an image file description. A page similar to the
following appears.
NOTE: The path can be a local or a network path. If you do not provide a path, the image file is saved on
the Desktop.