


Using the RILOE II 56
To resolve this problem, reboot the host server, and, after the operating system is available, the
Virtual Media CD-ROM is ready for use. This problem only occurs on servers with no physical CD-
ROM drive.
• Linux
• Red Hat Linux
On servers with a locally attached IDE CD-ROM, the virtual CD-ROM device is accessible at
/dev/cdrom1. However, on servers without a locally attached CD-ROM, such as the BL-class
blade systems, the virtual CD-ROM is the first CD-ROM accessible at /dev/cdrom.
The virtual CD-ROM can be mounted as a normal CD-ROM device using:
mount /mnt/cdrom1
• SLES 9
The SLES 9 operating system places USB-connected CD-ROMs in a different location and the
virtual CD-ROM can be found at /dev/scd0, unless there is already a USB-connected local CD-
ROM, in which case, it would be /dev/scd1.
The virtual CD-ROM can be mounted as a normal CD-ROM device using:
mount /dev/scd0 /media/cdrom11
Refer to "Mounting USB Virtual Media CD-ROM in Linux (on page 56)" for step-by-step instructions.
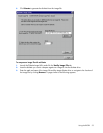
Mounting USB Virtual Media CD-ROM in Linux
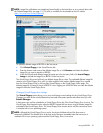
1. Access RILOE II through a browser.
2. Select Virtual Media in the Virtual Devices tab.
3. Select a CD-ROM to be used and click Connect.
4. Mount the drive using the following command:
mount /dev/cdrom1 /mnt/cdrom1
For SLES 9:
mount /dev/scd0 /media/cdrom11
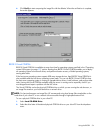
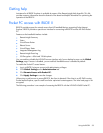
Creating RILOE II disk image files
The RILOE II virtual media feature enables you to create diskette and CD-ROM image files within the same
applet. Creation of DVD image files using the Virtual Media applet is not supported. The image files
created from the applet are ISO-9660 file system images. The performance of RILOE II virtual media is
faster when image files are used. The utility to create RILOE II Virtual Floppy and CD-ROM disk image files
is integrated into the Virtual Media applet; however, images can also be created using industry-standard
tools, such as DD.
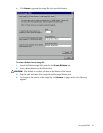
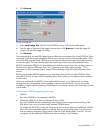
To create an image file:
1. Click Create Disk Image.
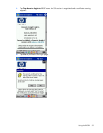
2. Select the local media drive from the dropdown menu.
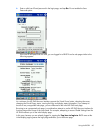
3. Enter the path or file name in the text box or click Browse to select an existing image file or to
change the directory in which the image file will be created.