


To run INSTALL, use the following procedure:
1. Insert the software utility diskette into drive A (or drive B) and
from the prompt type INSTALL followed by ENTER.
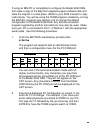
2. A menu titled "Drive & Directory Definitions" will appear on your
screen. This menu will display the
Source Drive
,
Destination
Drive
, and
Destination Directory
. The Source Drive is the
floppy drive where the diskette is inserted (default is drive A).
The Destination Drive is the drive where the expanded files will
copied to (default is drive C). The Destination Directory is the
directory where the files will copied to (default is BAYTECH). If
the default parameters do not match your application, you may
either use the TAB key or a mouse to change fields and type in
the desired parameters. Once you have entered the
appropriate values, select "OK".
3. A menu will appear on your screen titled "Series Definition".
This menu will contain choices for the type of BayTech product
you have purchased. Highlight "Model 24 Series" with the
arrow keys or mouse followed by "OK".
4. A menu titled "Printer Selection Programs" will appear on your
screen. You are given three selections: RAMEXEC, RAMTSR,
and WNDEXEC. Choose RAMEXEC if your PC runs non-
Windows programs that do not operate in graphics mode.
Choose RAMTSR if your PC runs non-Windows programs
which operate in graphics mode. Choose WNDEXEC if your
PC runs under WINDOWS. Once you have selected the
appropriate printer selection program, choose the "OK"
selection.
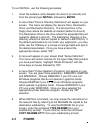
5. When INSTALL is finished, you may review the instructions for
the relevant files by referring to the README file copied to the
destination subdirectory. To view the README file on your
screen, enter the command TYPE README from your
subdirectory prompt. To print this file, enter the command
COPY README LPT1: from your subdirectory prompt.