


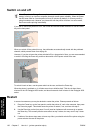

To complete the change, you must close and reopen your Web browser.
Password-protect the Embedded Web Server
1. In the Embedded Web Server, go to the Security page, which you can find in the Settings tab.
2. Enter a password of your own choice in the New password field.
3. Enter it again in the Confirm password field to guard against misspelling.
4. Click Set password.
Now no-one will be able to perform the following actions with the Embedded Web Server without
giving the password:
●
Manage print jobs in the queue (cancel, delete)
●
View previews of print jobs
●
Delete stored jobs
●
Clear accounting information
●
Update the printer's firmware
NOTE If you forget the password, see I cannot access the Embedded Web Server from my
browser.
Request E-mail notification of specific error conditions
1. In the Embedded Web Server, go to the E-mail server page, which you can find in the Settings
tab, and ensure that the following fields are correctly filled in:
●
SMTP server: the IP address of the outgoing mail server (SMTP) that will process all E-
mail messages from the printer. If the mail server requires authentication, E-mail
notifications will not work.
●
Printer E-mail address: each E-mail message sent by the printer must include a return
address, which does not need to be a real, functional E-mail address, but it should be
unique, so that recipients of the message can identify the printer that sent it.
2. Go to the Notification page, which is also in the Settings tab.
3. Click New to request new notifications (or Edit to edit notifications that have already been set
up). Then fill in the E-mail addresses to which notifications should be sent, and select the
incidents that should result in notification messages. Initially the most commonly-specified
incidents are shown; to see all the possibilities, click Show all alerts.
Set the date and time
The printer's date and time settings are mainly useful in job accounting (see Request accounting
data by E-mail). These settings can be changed using the Embedded Web Server or the printer's
front panel.
●
In the Embedded Web Server, go to the Settings tab and select Configuration, then Date &
Time.
●
At the front panel, select the
icon, then Printer configuration > Date and time options >
Set date or Set time or Set time zone.
ENWW Password-protect the Embedded Web Server 105
How do I... (printer
operation topics)