Removal and Installation
8-15
HP DesignJet 430, 450C and 455CA Printers
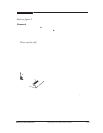
Removing the Encoder Strip
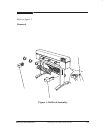
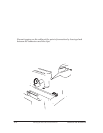
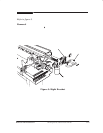
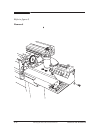
Refer to figure 4 ' page 16.
Removal
1. Move the cartridge carriage to the left, over the service station.
2. Remove the right endĆcover ' page 8Ć11.
3. Remove the left endĆcover ' page 8Ć10.
4. Disconnect the trailing cable from the main PCA and from the guides on
the right bracket. Fold the trailing cable upwards and store it on the
trailingĆcable guide.
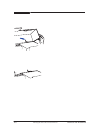
5. On the rightĆhand side, remove the two nuts (item 1) that secure the
encoder strip (item 2) to the encoderĆstrip spring (item 3).
6. Remove the screw (item 4) and washer (item 5) that secure the encoder strip
to the left bracket (item 6).
7. Compressing the encoderĆstrip spring to release tension on the encoder
strip, carefully release the encoder strip from the pin on the spring.
8. Carefully release the encoder strip from the left bracket.
9. Carefully pull the encoder strip to the right, through and out of the
carriage assembly and lay it on a flat surface.
Installation
1. Move the cartridge carriage to the left, over the service station.
2. Ensure that the encoder strip is oriented with the transparent area up.
3. Feed the encoder strip through the cartridge carriage from right to left.
4. Temporarily, rest the loose strip safely on the drive roller.
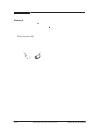
5. Slip the left end of the strip over the plastic pin on the left bracket (item 6),
and press it right to the base of the pin.
6. Loosely fit, but do not tighten, the washer (item 5) and screw (item 4) to
retain the encoder strip.
7. Slip the right side of the encoder strip (item 2) over the two pins on the
encoderĆstrip spring (item 3) and replace the two nuts (item 1) on the
right side, and slightly tighten the nuts.
8. Slightly tighten the screw (item 4) on the left side.
9. Slide the carriage back and forth the length of its travel to ensure free
movement. The encoder strip should not bind or rub on the carriage.


