


Set up and use fax 11
English
Step 2: Test fax setup
Test your fax setup to check the status of the
printer and make sure it is set up properly
for faxing.
The fax test does the following:
• Tests the fax hardware
• Veries the correct type of phone cord is
connected to the printer
• Checks that the phone cord is plugged
into the correct port
• Checks for a dial tone
• Checks for an active phone line
• Tests the status of your phone line
connection
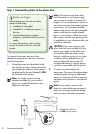
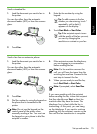
1. From the printer’s control panel, touch
right arrow and then touch Setup.
2. Touch Tools, and then touch Run Fax
Test. The printer displays the status of
the test on the display and prints a
report. After the test is nished, the
printer prints a report with the results of
the test. If the test fails, review the report
for information on how to x the
problem and rerun the test. For
additional troubleshooting information,
see ”Problems setting up the printer” on
page 24.
3. Once the fax test has run successfully,
go to ”Step 3: Congure fax settings”
on page 11.
Step 3: Congure fax settings
Change the printer’s fax settings to meet
your needs after you have connected the
printer to a phone line.
Note: To use the same fax resolution
and lighter/darker settings for all faxes
sent from the printer, congure the
settings as you wish, and then touch
Set as New Defaults.
Where can I change fax
settings?
You can congure fax settings using
the following tools:
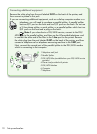
Printer’s control panel
Touch Fax on the printer’s control
panel, touch Settings, and then select
the setting you want to congure.
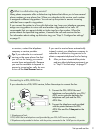
HP software
If you have installed the HP software
on your computer, you can congure
fax settings using the software that was
installed on your computer.
For more information about using these
tools or settings, see the user guide.