


Removal and replacement procedures 17
Removing the access panel
WARNING: To reduce the risk of personal injury from hot surfaces, allow the drives and
the internal system components to cool before touching them.
CAUTION: Do not operate the server for long periods with the access panel open or removed. Operating
the server in this manner results in improper airflow and improper cooling that can lead to thermal damage.
IMPORTANT: When removing the access panel to view QuickFind diagnostic LEDs ("QuickFind diagnostic
display LEDs" on page 78), leave the server powered on. The QuickFind diagnostic LEDs are cleared when
the server is powered off.
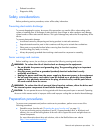
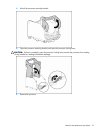
1. Extend the server from the rack, if applicable ("Extending the server from the rack" on page 15).
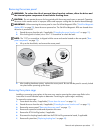
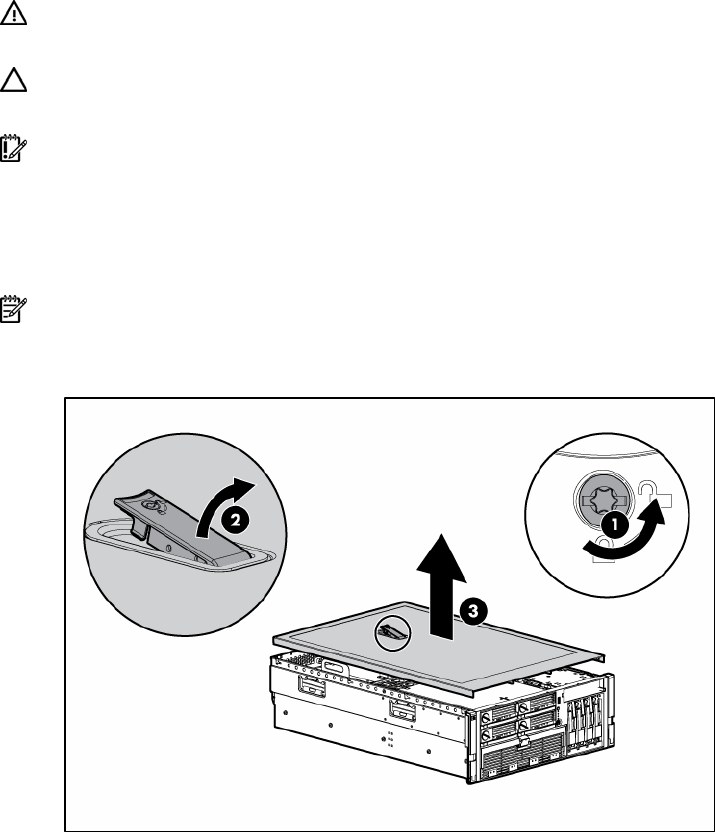
2. If the locking latch is locked, use a Torx T-15 screwdriver to unlock the latch.
NOTE: The T-15 Torx screwdriver is shipped with the server and can be located on the rear panel ("Rear
panel components" on page 73).
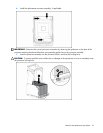
3. Lift up on the hood latch, and remove the access panel.
4. After installing hardware options, replace the access panel. Be sure that the panel is securely locked
into place before powering up the server.
Removing the system cage
Installing or accessing some options in the server may require removing the system cage. Refer to the
instructions for each individual option to determine if removing the system cage is necessary.
To remove the system cage:
1. Power down the server, if applicable ("Power down the server" on page 16).
2. Extend the server from the rack, if applicable ("Extending the server from the rack" on page 15).
3. Remove the access panel ("Removing the access panel" on page 17).
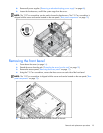
4. Remove all expansion boards and expansion slot covers.
5. Remove the PCI-X Hot Plug basket, if applicable.
6. Disconnect the hot-plug board cable from the PCI-X Hot Plug mezzanine board, if applicable.
7. Remove all system fans ("Replacing hot-plug fans" on page 49).