


SECTION 3
OPERATING THE PRINTER
Installing the Printer Driver
FlexMail3 Users: You may find newer printer driver versions on your FlexMail3 CD. However;
Rena Systems suggests installing and using the printer drivers distributed with the printer, or drivers
downloaded from
www.renausa.com. These are tested and approved drivers by Rena Systems Inc.
Other driver versions may not work properly.
These drivers should not be used with FlexMail 2.
Satori Bulk Mailer 5.0 Users: Satori has developed their own printer drivers for use with their
software product. Therefore, Satori recommends that you load and use the printer drivers available to
you on the Satori Bulk Mailer 5.0 CD. If not, the Bulk Mailer software may not function properly
with the printer.
A dedicated printer driver is included on CD, with the printer. It must be installed on your computer before
you will be able to print from your software. Follow the steps below to install the driver:
NOTE: A “Launch Menu” should open automatically, when the Driver Installation CD is inserted into
your CD-ROM drive. Select “Install Printer Drivers” from the launch menu. If the launch
menu does not open; please use the steps below to install the printer driver.
1. If you have, any applications running on your computer close them and restart the computer before
beginning the driver installation.
2. Install the CD in the CD drive and click on START.
Then click on RUN, then type the following;
D:\Drivers\Setup.exe (where D is the CD drive) then
click OK.
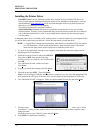
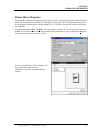
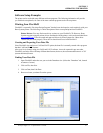
3. The “Add Printer Wizard” window will open.
Click N
ext>.
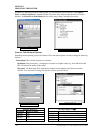
4. Type in your Name and Company and click N
ext>.
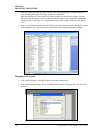
5. Select the printer port LPT1. Then click N
ext>.
Note: If you are using the USB port, and the printer is connected, you may select the appropriate USB
port, instead of the LPT1 port, at this time. You can also change the port assignment at a later time.
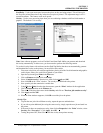
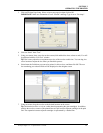
6. The “Add Printer Wizard” will appear. Select your printer model from the list, then click Next>
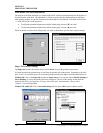
7. The next screen allows you to “Name
Your Printer”. Unless you have another printer of the same name on your system or network, don’t
change the name.
Select this printer as your “Default” printer and click N
ext>.
8. Click Finish to complete the installation.
Envelope Imager 1.5/1.5 Plus Operations (Rev.6/7/2007)
22