


E-26
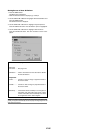
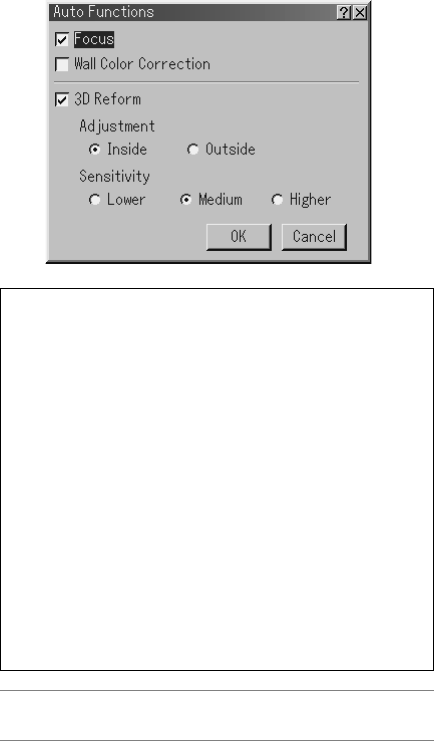
Setting Screen of Auto 3D Reform
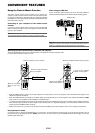
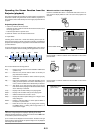
1. Press the MENU button.
The Basic menu is displayed.
* When the Advanced menu is displayed, go to Step 3.
2. Use the SELECT
̆
or
̄
button to highlight “To Advanced Menu” and
press the ENTER button.
The Advanced menu is displayed.
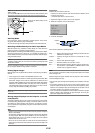
3. Use the SELECT
̆
or
̄
button to highlight “Projector Options”.
Press the SELECT
̈
button. The “3D Reform” option is highlighted.
4. Use the SELECT
̆
or
̄
button to highlight “Auto Functions”.
Press the SELECT
̈
button. The “Auto Functions” screen is dis-
played.
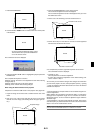
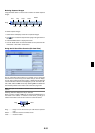
Focus ............. See page E-49.
Wall Color
Correction ...... See page E-49.
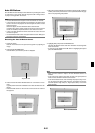
3D Reform ..... Clear a check mark from the check box to disable
the Auto 3D Reform.
Adjustment
Inside ............. Corrects so that an image is projected inside of
the screen outline.
Outside .......... Corrects so that an image is projected outside of
the screen outline.
Sensitivity ...... If the built-in sensor sensitivity is so strong that it
recognizes even lines within the screen, select
“Lower”. If the built-in sensor sensitivity is too weak
to recognize the screen, select “Higher”.
NOTE: If you failed to correct for placing the image inside of the screen using
[Inside], the projector automatically corrects to project the image larger than the
outer frame of the screen.