


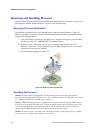

Hardware Installations and Upgrades
20 Intel
®®
Server System R1000GZ/GL Service Guide
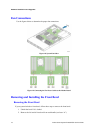
Removing and Installing Processor
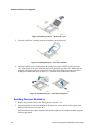
The heatsink has thermal interface material (TIM) on the underside of it. Use caution so that you do
not damage the thermal interface material. Use gloves to avoid sharp edges.
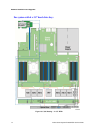
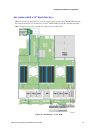
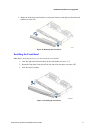
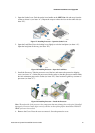
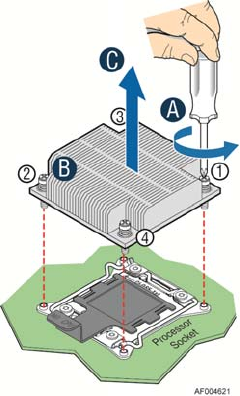
Removing Processor Heatsink(s)
The heatsink is attached to the server board/processor socket with captive fasteners. Using a #2
Phillips* screwdriver, loosen the four screws located on the heatsink corners in a diagonal manner
using the following procedure:
1. Using a #2 Phillips* screwdriver, start with screw 1 and loosen it by giving it two rotations
and stop (see letter “A”). (IMPORTANT: Do not fully loosen.)
2. Proceed to screw 2 and loosen it by giving it two rotations and stop (see letter “B”).
Similarly, loosen screws 3 and 4. Repeat steps A and B by giving each screw two rotations
each time until all screws are loosened.
3. Lift the heatsink straight up (see letter “C”).
Figure 26. Removing Processor Heatsink
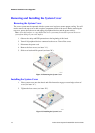
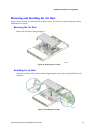
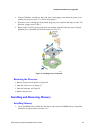
Installing the Processor
Caution: Processor must be appropriate: You may damage the server board if you install a
processor that is inappropriate for your server. For a web link to the list of compatible processor(s),
see “Additional Information and Software” on page 4.
Caution: ESD and handling processors: Reduce the risk of electrostatic discharge (ESD) damage
to the processor by doing the following: (1) Touch the metal chassis before touching the processor
or server board. Keep part of your body in contact with the metal chassis to dissipate the static
charge while handling the processor. (2) Avoid moving around unnecessarily.
Caution: Protective socket cover needs to be removed for proper cooling of the processor; failure
to remove the cover could result in damage to the system.