


22
Setting the Receivable Signal Types
You can set the receivable signal types. Normally, select
“AUTO.”
A common setting will apply to both VIDEO A and B
terminals, and a different setting will apply to the
COMPONENT terminals.
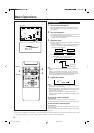
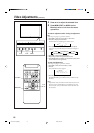
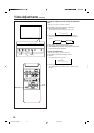
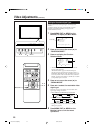
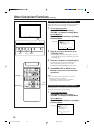
1
Press MENU/EXIT (or MENU on the
Monitor) to display the Main Menu.
2
Press 5/∞ to move the cursor (3) to
“FUNCTION SELECT.”
3
Press 3 to display the Function
Selection Menu.
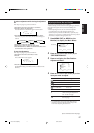
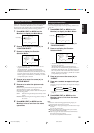
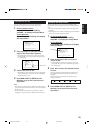
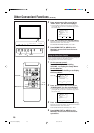
* “PICTURE MODE” and “SIGNAL MODE” do not
appear at the same time.
“PICTURE MODE” appears when RGB input is
selected, and one of the following signals comes in —
RGB15K-50, RGB15K-60, PC98, VGA480-60, SVGA-56,
SVGA-60, and XGA-60. On the other hand, “SIGNAL
MODE” appears when VIDEO A, VIDEO B, or COMP.
(component) input is selected.
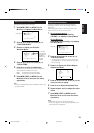
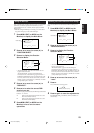
4
Press 5/∞ to move the cursor (3) to
“SIGNAL MODE.”
5
Press 2/3 to select the receivable video
signal type.
Each time you press the button, the receivable video
signal type changes as follows:
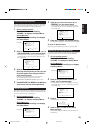
• When VIDEO A or VIDEO B input is selected:
•
When COMPONENT input is selected:
* Changes according to the “HD SIGNAL MODE”
setting (see page 27).
6
Press MENU/EXIT (or MENU on the
Monitor) twice to exit the menu
operations.
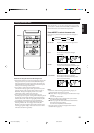
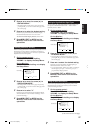
PICTURE ADJ.
SIZE/POSITION ADJ.
FUNCTION SELECT
STATUS DISPLAY
ENTER:
MAIN MENU
SELECT:
EXIT:
MENU
Cursor (3)
MENU/EXIT
2 / 3
5 /
5
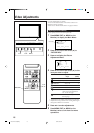
DISPLAY ASPECT POWER
RGB
COMPO.
VIDEO B
VOLUME
MULTIPLE
MODE ID SET
MONITOR ADJUSTMENT
VIDEO A
MUTING
MENU/EXIT
RM-C575 REMOTE CONTROL UNIT
ID
Video Adjustments (Continued)
COLOR TEMP.
PICTURE MODE
ASPECT
SIGNAL MODE
RGB INPUT
reset
FUNCTION SELECT
ADJUST:
SELECT:
EXIT:
MENU
: HIGH
: STILL
: PANORAMA
: AUTO
: A
*
*
AUTO NTSC
PALSECAM
NTSC4.43
AUTO 480i 576i
480p720p
1080i
(1035i)*
MENU INPUT POWER
MENU INPUT POWER
MENU
2 / 3
5
5 /
14-23.GD-V4210PZW[EN]/f 00.9.29, 5:55 PM22