Chapter 3---Service Adjustments
either one of these adjustments while the set screws are loose may
cause the CRT to go out of focus or rotate.
3.5 CRT Mechanical Focus
The CRT Mechanical focus is factory-set and will not normally
require adjustment. When a CRT is replaced, the CRT mechanical
focus must be reset. Adjust colors individually. After completing,
recheck other colors for additional adjustment. Replacing the CRT
could cause other colors to become misadjusted. Use the Focus
test pattern (an external signal or other test patterns can also be
used) for adjustment.
To adjust the CRT Mechanical Focus:
1. Remove the rear cover (Section 4.2)
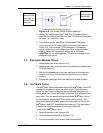
2. Tilt the Electronic Module to the upright position (Section 3.3).
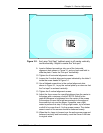
3. Select the Focus test pattern.
3. Zoom the Projection Lens to the widest angle (largest image)
and adjust the Projection Lens focus for the sharpest image of
the Focus test pattern.
4. Tilt the Electronic Module up (Section 3.3).
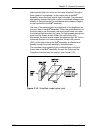
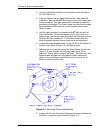
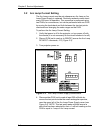
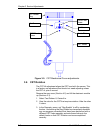
5. Loosen the two set screws (Figure 3-5) near the top of the CRT
sleeve.
6. Loosen the CRT focus lock screw located on the Guide Plate at
the top of the CRT shield (Figure 3-5). The CRT is now free to
slide.
7. Grasp the CRT thumbscrew (Figure 3-5) and slide the CRT
back and forth until the image is focused as sharply as possible
(be careful not to loosen the CRT thumbscrew which could
cause the CRT to rotate).
8. Tighten the set screws first, then the CRT focus lock screw.
NOTE: Tighten set screws before focus lock screw. The focus
lock screw can slightly defocus or rotate the CRT as it is being
tightened if the set screws are loose.
9. Repeat the above steps for the Red and Blue CRTs.
Model 200 Service Manual 3-7


