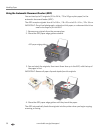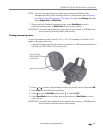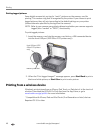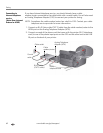
Faxing
70 www.kodak.com/go/aiosupport
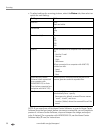
Deleting a phonebook entry
To delete a phonebook entry:
1. Press Phonebook.
2. Make sure Edit Phonebook is selected, then press OK.
3. Press to select Delete Entry, then press OK.
4. Press to select the entry you want to delete, then press OK.
NOTE: If you do not want to delete the entry, press Cancel.
5. To delete the entry, press OK.
The entry is deleted from the phonebook.
6. Repeat steps 4 – 5 to delete more entries; when you are finished, press Back or
Cancel.
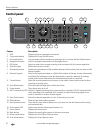
Using the numeric keypad on the control panel to enter text and/or numbers
The number keys on the numeric keypad represent a number and several characters.
For example, the number 2 key also represents the letters A, B, C and a, b, and c. You
must press the 2 key multiple times to enter a corresponding letter. For example, to
enter the letter “B” as the first letter of a name, press the 2 key two times; to enter
the small letter “b” at the beginning of a name, press the 2 key five times. If the small
letter “b” is not at the beginning of a name or word, press the 2 key two times.
If you need to use the same key for more than one letter in a row (for example, to
type “Cab”), you need to pause between letters. To type “Cab”, press the 2 key three
times to enter “C”, then pause 3 to 4 seconds; press the 2 key once to enter “a”, then
pause for 3 to 4 seconds; and press the 2 key two times to enter “b”. You do not need
to pause if the next letter is on a different key.
Note that the Symbols (*) key and the Space (#) key also cycle through several
different symbols when you press the key multiple times.
To make a correction to your entry, press (navigation button) on the control panel
to erase the rightmost character.
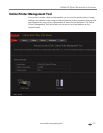
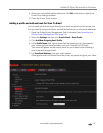
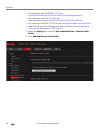
Using the Online Printer Management Tool to edit the Fax Phone Book
1. Open the Online Printer Management Tool in a browser (see Accessing the
Online Printer Management Tool, page 14).
2. Select the
Settings tab, then click Fax > Phonebook.
3. For each entry, type a
Name and Fax number. Select a Quick Dial as needed.
4. Click
Add to update the printer.
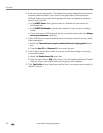
5. Select the check box for an existing entry in the
Phone Book.
6. Edit or delete the entry as needed.
7. Click
Save to update the printer.