


Scanning Your Pictures
30 Kodak ESP 5 Printer User Guide
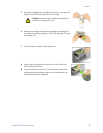
3 Press until Scan is selected.
4 Press
Start.
5 When the Scanner dialog window displays on your computer, follow the prompts to
finish the scanning process.
Scanning Multiple Originals
Kodak’s Home Center software can detect multiple photos when placed on the All-in-One
scanner glass. Allow some space on the scanner glass between each item, and use Home
Center to save each photo a separate file. Home Center interprets any originals with
touching or overlapping edges as a single image.
Home Center cannot interpret two or more documents, or a combination of documents and
photos, as separate scanned items.
Adjusting Scan Settings
You can change the factory default scan settings for your printer using the control panel.
When you change scan settings from the control panel, the settings apply only to the
current scan job. To apply scan settings to all future scan jobs, you can save your changes.
1 Press
Menu to display the main menu.
2 Press
until Scan is selected.
3 Press
OK to display the Scan menu.
4 As needed, press
to change the scan settings for Scan What and Scan To.
5 To keep the settings as permanent, press
until Save as Defaults is selected, and
then press
OK.
6 Press
Start to initiate the scan.
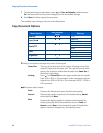
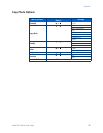
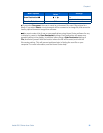
The available scan settings are in the table below:
Scan Options
Note: Any changes you make to the scan settings apply only to the
current scan operation.
Menu Options
View Settings /
Select
Settings
Scan What
or
Document
Photo
Scan To
or
Computer
Memory Card