


4-2 Connecting and Printing
Connections
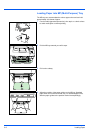
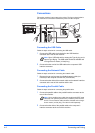
This section explains how to start up the printer. The figure shown below is
the overviews of connections between the printer and the computer.
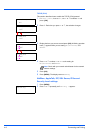
Connecting the USB Cable
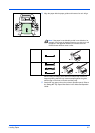
Follow the steps as below for connecting the USB cable.
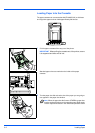
1 Connect the USB cable (not included) to the USB interface
connector at the rear of this machine.
2 Connect the other end of the USB cable to the computer's USB
interface connector.
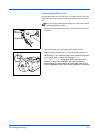
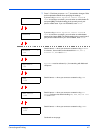
Connecting the Network Cable
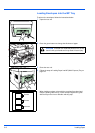
Follow the steps as below for connecting the network cable.
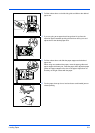
1 Remove the cap and connect the shielded network cable (not
included) to the computer and the hub (concentrator).
2 Connect the other side of the network cable to the network interface
connector at the rear of this machine and the hub.
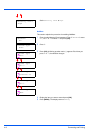
Connecting the Parallel Cable
Follow the steps as below for connecting the parallel cable.
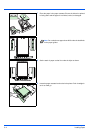
1 Connect the parallel cable to the parallel interface connector at the
rear of this machine.
2 Connect the other side of the parallel cable to the computer’s
interface connector at the rear of this machine.
Note Use a USB cable with a rectangular Type A plug and a
square Type B plug. The USB cable should be shielded and
no longer than 5 meters (16 feet) long.
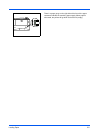
Note Use a parallel printer cable that complies with IEEE 1284
standards. For optimum performance, install the printer close to
the PC. The connection cable should be shielded and no longer
than 3 meters (10 feet) long. The cable is solid separately
.