Default Setting (System Menu)
9-47
9
Destination
Set the address to which transmission copies are to be forwarded.
Use the procedure below to set the default Destination.
1 Press the System Menu key.
2 Press [Send] > [Next] of Send and Forward > [Change] of Destination.
3 To specify the forwarding destination from the address book, press [Address Book]. To specify by entering
an e-mail address, press [E-mail Addr Entry]. To specify a folder, press [Folder Path Entry].
The procedure differs depending on the transmission method selected.
Specifying an address from the address book
Select the address to be specified as a forwarding destination.
NOTE: Destinations can be sorted or searched by destination name or address number. Refer to Specifying
Destination on page 3-40 for Address List.
Specifying by entering an e-mail address
Press [E-mail Address], enter the e-mail address, and press [OK].
NOTE: Refer to the Character Entry Method on page Appendix-9 for details on entering characters.
Specifying a folder
Select [FTP] or [SMB], press [Host Name], [Path], [Login User Name], and [Login Password], enter each
item, and press [OK].
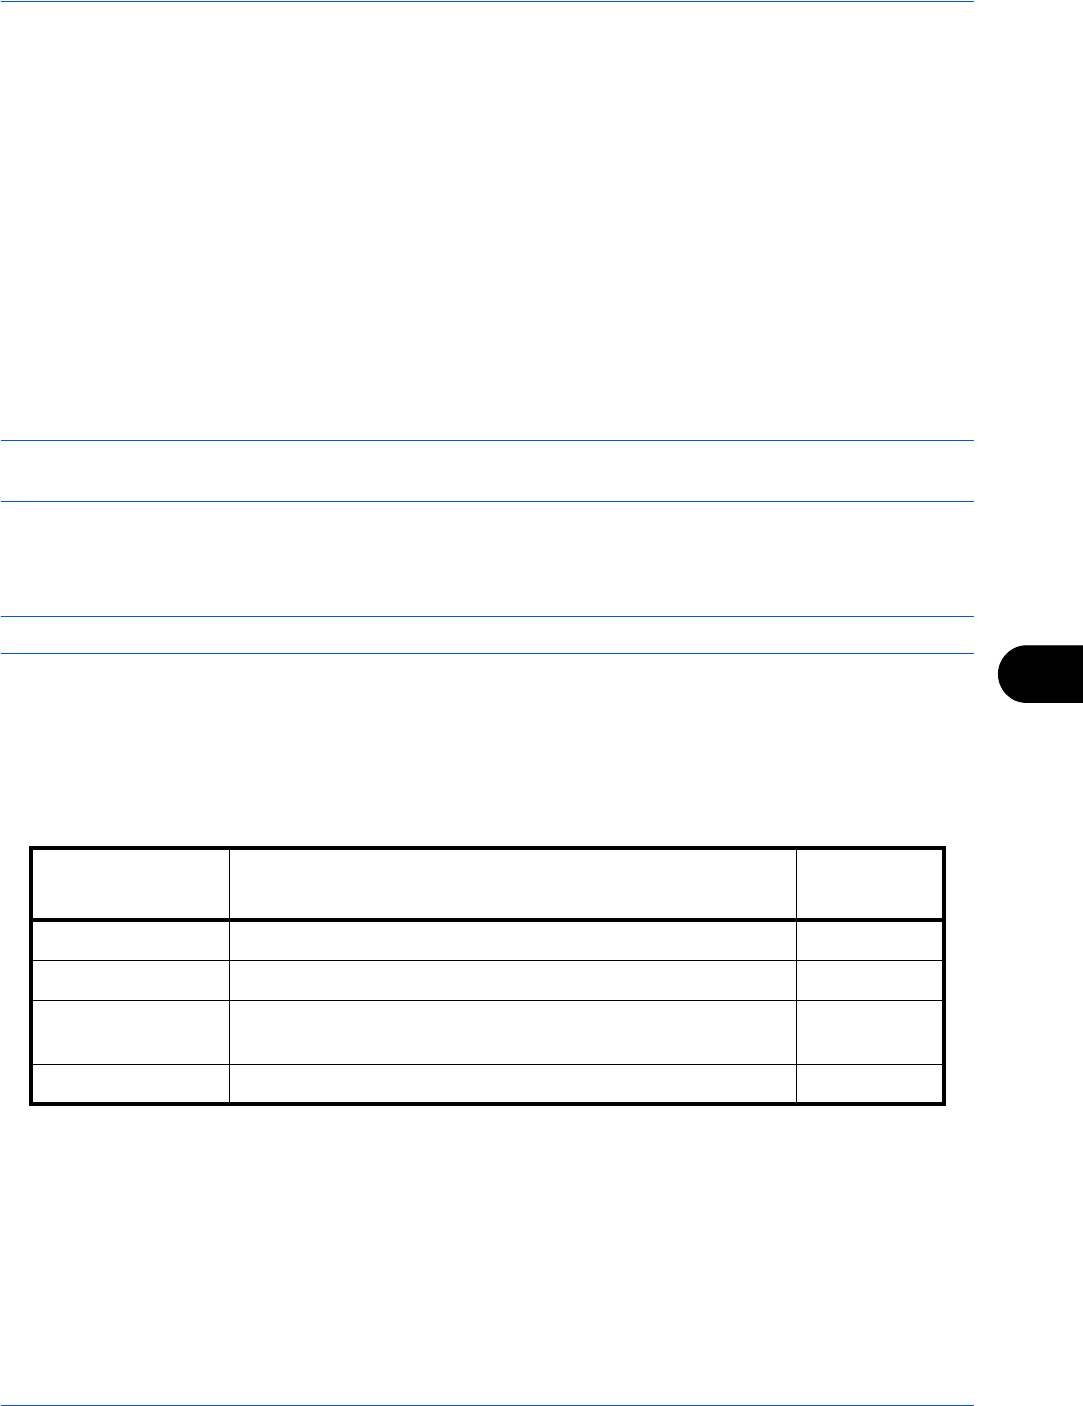
The table below explains the items to be entered.
* If you specify a port number other than the default (FTP: 21, SMB: 139), use the "Host name: port
number" format.
(e.g., FTPhostname:140)
To enter the IPv6 address, enclose the address in brackets [ ].
(e.g., [3ae3:9a0:cd05:b1d2:28a:1fc0:a1:10ae]:140)
Item Description
Max. No. of
Characters
Host Name* Host name or IP address of server or computer to be sent to. 64
Path Path for the file to be stored (e.g., "User\ScanData") 128
Login User Name User name server login
Domain Name\User Name (e.g., "abcdnet\james.smith")
64
Login Password Password for server login 64


