Preparation before Use
2-15
2
Network Setup (LAN Cable Connection)
The machine is equipped with network interface, which is compatible with network protocols such as TCP/IP
(IPv4), TCP/IP (IPv6), IPX/SPX, NetBEUI, IPSec, and AppleTalk. It enables network printing on the Windows,
Macintosh, UNIX, NetWare and other platforms.
This section explains the TCP/IP (IPv4) Setup and AppleTalk Setup procedures. For other network settings,
refer to the Network on 9-90.
• TCP/IP (IPv4) Setup...2-15
• AppleTalk Setup...2-17
NOTE: If user login administration is enabled, you can only change the settings by logging in with
administrator privileges. If user login administration is disabled, the user authentication screen appears. Enter
a login user name and password, and press [Login]. Refer to Adding a User (Local User List) on page 10-5 for
the default login user name and password.
TCP/IP (IPv4) Setup (by Entering IP Addresses)
Set up TCP/IP (IPv4) to connect to the Windows network. Set the IP addresses, subnet masks, and gateway
addresses. The default settings are "TCP/IP Protocol: On, DHCP: On, Bonjour: Off, Auto-IP: On".
NOTE: Prior to the IP address entries, obtain permission from the network administrator.
Use the procedure below.
1 Press the System Menu key.
2 Press [System], [Next] of Network and then [Next]
of TCP/IP Setting.
3 Press [Change] of TCP/IP.
4 Press [On] and then press [OK].
5 Press [Change] of IPv4.
6 Press [DHCP].
7 Press [Off] of DHCP and then press [OK].
8 Press [Bonjour].
9 Press [Off] of Bonjour and then press [OK].
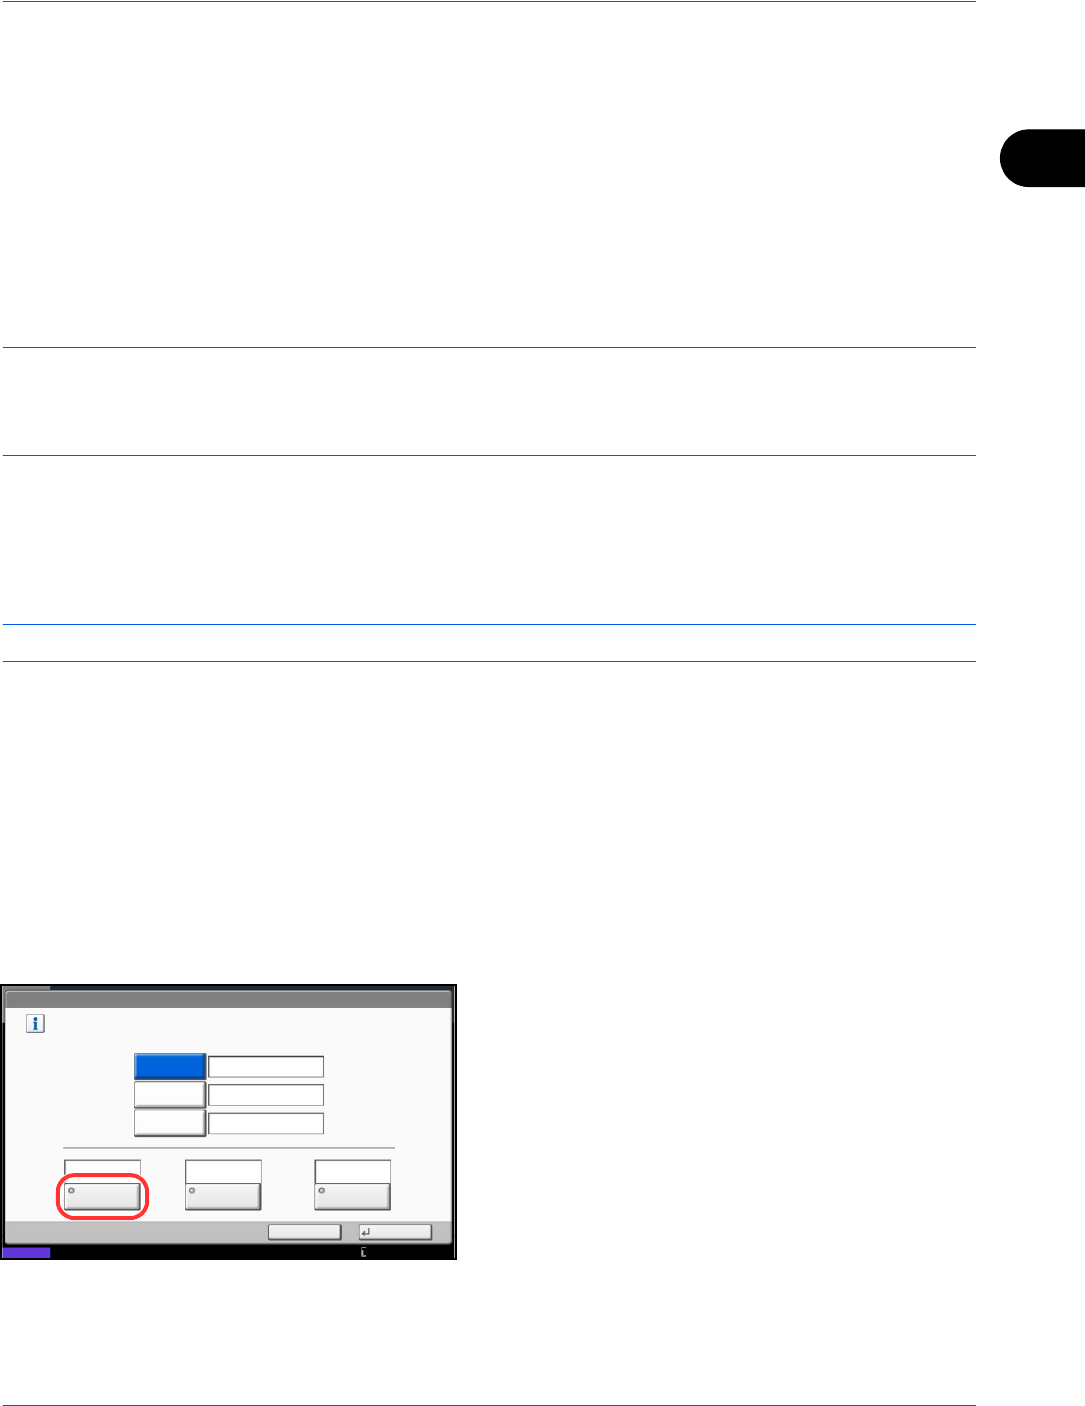
10 Press [IP Address] and enter the address using the
numeric keys.
11 Press [Subnet Mask] and enter the address using
the numeric keys.
12 Press [Default Gateway] and enter the address
using the numeric keys.
System - IPv4
Set TCP/IP (IPv4).
* The setting will be changed after restarting the device or network.
On
Default
Gateway
0.0.0.0
0.0.0.0
0.0.0.0
Off
IP Address
Subnet Mask
Off
BonjourDHCP
Status
Cancel
OK
On
Auto-IP
10/10/2010 10:10


