PremierWave XN User Guide 32
6: Network Settings
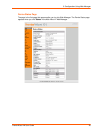
The Network Settings show the status of the Ethernet or WLAN interface/link and let you configure
the settings on the device. Interface settings are related to the configuration of the IP and related
protocols. Link settings are related to the physical link connection, which carries the IP traffic.
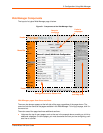
The PremierWave XN contains two network interfaces. Only one interface may be active at a
time; however, if bridging is enabled, both interfaces will be activated and controlled by the
bridging subsystem.The Ethernet interface is also called interface 1 or eth0, and the WLAN
interface is called interface 2 or wlan0.
Notes:
Some settings require a reboot to take effect. These settings are noted below.
Wait a minimum of 10-20 seconds after rebooting the unit before attempting to make
any subsequent connections.
The blue text in the XML command strings of this chapter are to be replaced with a
user-specified name.
Network Interface Settings
Table 6-1 shows the network interface settings that can be configured.
These settings apply to both the Ethernet (eth0) and WLAN (wlan0) interfaces, but are configured
independently for each interface.
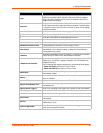
Table 6-1 Network Interface Settings
Network Interface
Settings
Description
State Enables or disables the interface.
BOOTP Client Select to turn On or Off. At boot up, after the physical link is up, the
PremierWave will attempt to obtain IP settings from a BOOTP server.
Note: Overrides the configured IP address/mask, gateway, hostname, and
domain. When DHCP is Enabled, the system automatically uses DHCP,
regardless of whether BOOTP is Enabled. Changing this value requires you to
reboot the device.
DHCP Client Select to turn On or Off. At boot up, after the physical link is up, the
PremierWave will attempt to obtain IP settings from a DHCP server and will
periodically renew these settings with the server.
Note: Overrides BOOTP, the configured IP address/mask, gateway,
hostname, and domain. Changing this value requires you to reboot the device.
Note: Within WebManager, click Renew to renew the DHCP lease.


