Printing a network setup page
If the printer is attached to a network, then print a network setup page to verify the network connection. This page
also provides important information that aids network printing configuration.
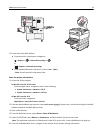
1 Make sure the printer is on and Ready appears.
2 From the printer control panel, press .
3 Press the up or down arrow button until Reports appears, and then press .
4 Press the up or down arrow button until Network Setup Page appears, and then press .
Note: If an optional internal print server is installed, Print Network <x> Setup Page appears.
5 Check the first section on the network setup page, and confirm that Status is “Connected.”
If Status is “Not Connected,” the LAN drop may not be active, or the network cable may be malfunctioning. Consult
a system support person for a solution, and then print another network setup page.
Setting up the printer software
Installing the printer software
Notes:
• If you installed the printer software on the computer before but need to reinstall the software, then uninstall
the current software first.
• Close all open software programs before installing the printer software.
1 Obtain a copy of the software installer package.
• From the Software and Documentation CD that came with your printer.
• From our Web site:
Go to
http://support.lexmark.com, and then navigate to:
SUPPORT & DOWNLOAD > select your printer > select your operating system
2 Double‑click the software installer package.
Wait for the installation dialog to appear.
If you are using a Software and Documentation CD and the installation dialog does not appear, then do the following:
In Windows 8
From the Search charm, type run, and then navigate to:
Apps list > Run > type D:\setup.exe > OK.
In Windows 7 or earlier
a
Click or click Start, and then click Run.
b In the Start Search or Run dialog, type D:\setup.exe.
c Press Enter, or click OK.
Additional printer setup 28


