


20
Chapter 7: Using the Wireless-G Ethernet Bridge Web-based Utility
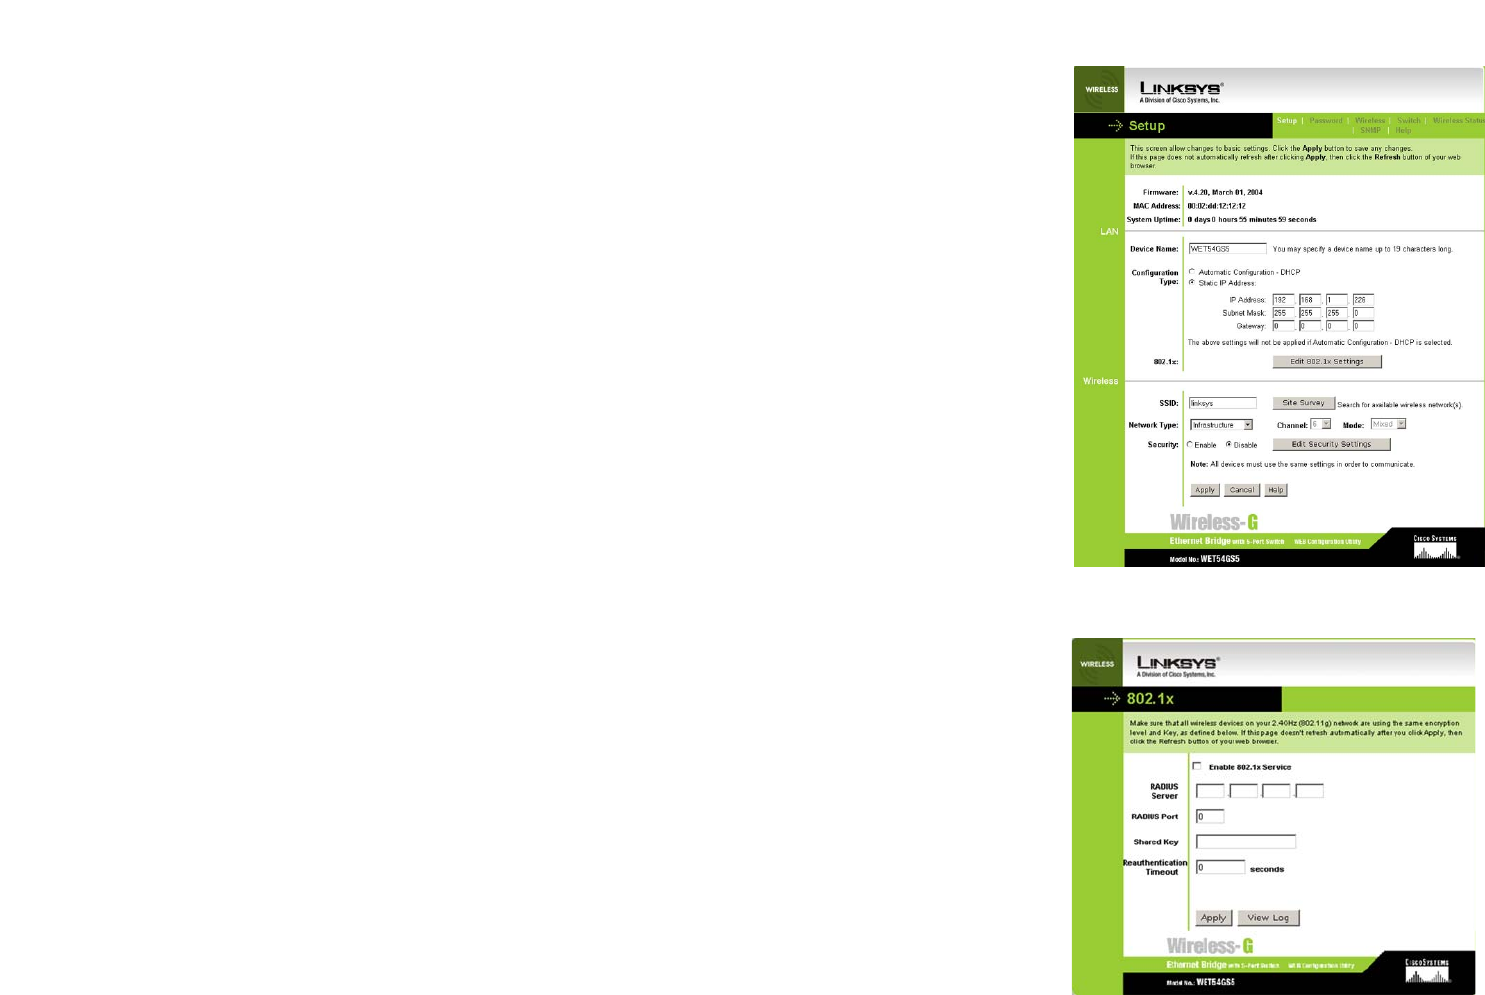
Setup
Wireless-G Ethernet Bridge with 5-Port Switch
Setup
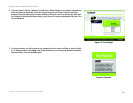
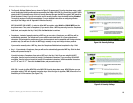
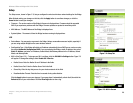
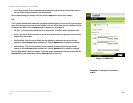
The Setup screen, shown in Figure 7-2, lets you configure the wired and wireless network settings for the Bridge.
When finished making your changes on this tab, click the Apply button to save these changes, or click the
Cancel button to undo your changes.
• Firmware - The version number of the Bridge’s firmware is displayed here. Firmware should be upgraded
ONLY if you experience problems with the Bridge. Firmware updates are posted at www.linksys.com.
• MAC Address - The MAC Address of the Bridge is displayed here.
• System Uptime - The amount of time the Bridge has been running is displayed here.
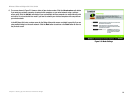
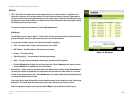
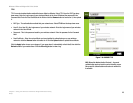
LAN
• Device Name - You may assign any name to the Bridge. Unique, memorable names are helpful, especially if
you are using multiple bridges on the same wireless network.
• Configuration Type - If the Bridge will obtain an IP address automatically from a DHCP server, such as a router,
then select Automatic Configuration-DHCP. If you are assigning the Bridge a static IP address, then select
Static IP Address, and enter an IP Address, Subnet Mask, and Gateway address in the IP Address, Subnet
Mask, and Gateway fields.
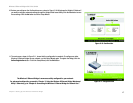
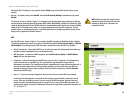
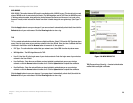
• 802.1x (See Figure 7-3.) - To change your 801.1x settings, click the Edit 802.1x Settings button. Figure 7-3
will appear. To change the settings, select Enable 801.x Service.
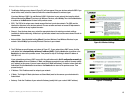
• Radius Server. Enter the Radius Server IP Address in the fields.
• Radius Server Port. Enter the Radius Server Port in the field.
• Shared Key. Enter the key that you use for your wireless network in the field.
• Reauthentication Timeout. Enter the time in seconds for key authentication.
Click the Apply button to save your changes. If your page doesn’t automatically refresh itself, then click the
Refresh button of your web browser. Click the View Log button to view a log.
Figure 7-2: Setup Tab
Figure 7-3: 802.1x Screen