


7-17
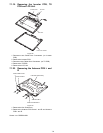
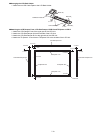
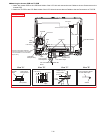
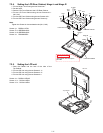
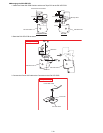
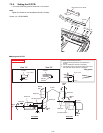
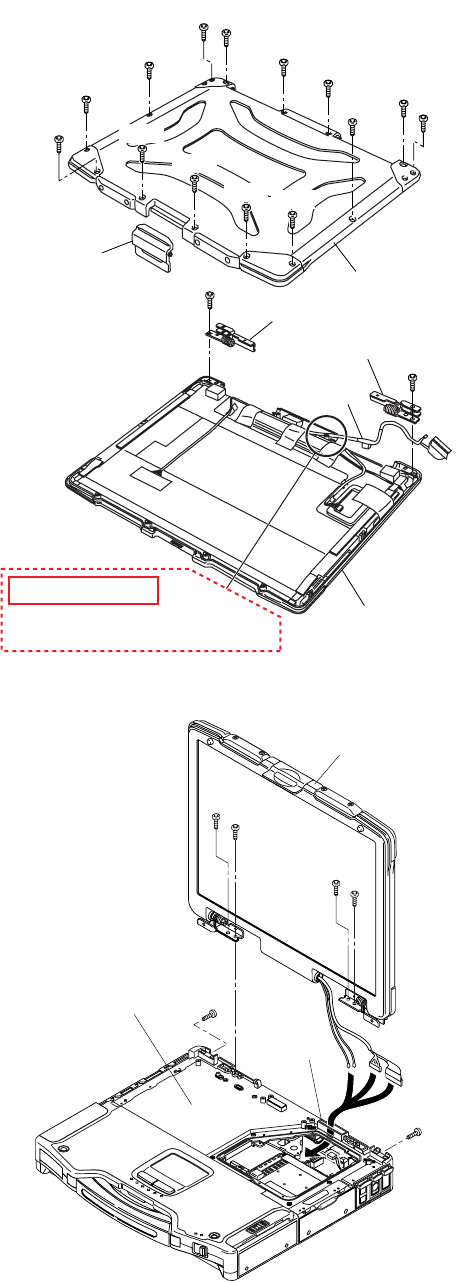
7.2.4. Setting the LCD Rear Cabinet, Hinge L and Hinge R
1. Fix the Hinge L and R using the two Screws<e>.
2. Set the Latch.
3. Set the LCD Front Cabinet to the LCD Rear Cabinet.
4. Fix the LCD Front Cabinet using the two Screws<k-1>.
No1, No2
5. Fix the LCD Front Cabinet using the ten Screws<k-2>.
6. Fix the LCD Front Cabinet using the two Screws<j>.
Note:
Tighten the Screws in the numbered order (No1, No2).
Screws <j>: DRSB4+10FKL
Screws <k-1>:DRSB26+8HKL
Screws <k-2>:DRSB26+8HKL
Screws <l>: DRHM0062ZA
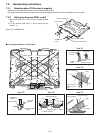
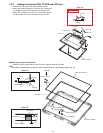
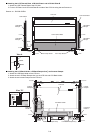
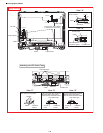
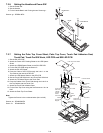
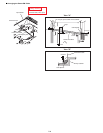
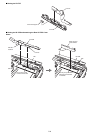
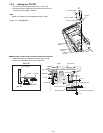
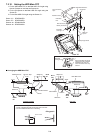
7.2.5. Setting the LCD unit
1. Pass the Cables into the hole of the hole of the
Top Ca bi net .
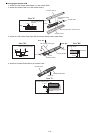
2. Fix the LCD Unit using the two Screws<i-1>.
3. Fix the LCD Unit using the two Screws<i-2>.
4. Fix the LCD Unit using the two Screws<h>.
Screws <h>: DXSB4+12FNLB
Screws <i-1>: DXYN4+J8FNL
Screws <i-2>: DXYN4+J8FNL
<k-2>
<l>
<l>
<j>
<k-2>
<k-2>
<j>
<k-2>
<k-2>
<k-2>
<k-2>
<k-2>
<k-1>
:No2
<k-1>
:No1
<k-2>
<k-2>
LCD Latch
LCD Rear Cabinet
LCD Front Cabinet
Take extreme care not to pinch
the cable.
Hinge L
Hinge R
Cable
Safety Working
<i-2>
<i-1>
<h>
<i-2>
<i-1>
<h>
LCD unit
Top Cabinet
Hole