


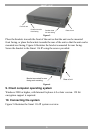

SMART 116 IP
13
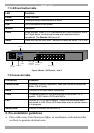
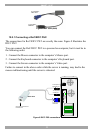
10.3 Connecting the CAT5 cables
1. Connect one connector to the RoC/RICCs RJ45 port.
2. Connect the other connector to one of the Smart 116 IP’s Computer ports.
3. Follow the above 2 steps for each computer.
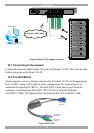
10.4 Connecting a KVM console
To operate the system locally, connect a KVM console to the Smart 116 IP:
1. Connect the monitor’s connector to the Smart 116 IP’s Monitor port.
2. Connect the keyboard’s connector to the Smart 116 IP’s Keyboard port.
3. Connect the mouse’s connector to the Smart 116 IP’s Mouse port.
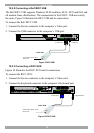
10.5 Connecting the power supply
1. Connect the Smart 116 IP to the power supply using the Power cord provided.
Only use the power cord supplied with the unit.
2. Switch on the servers/computers.
11. Initial settings - Default IP address
The following sections provide instructions for setting the IP address for the Smart
116 IP unit.
By default, Smart 116 IP boots with an automatically assigned IP address from a
DHCP (Dynamic Host Configuration Protocol) server on the network. The DHCP
server provides a valid IP address, gateway address and subnet mask.
To identify the IP address, the Smart 116 IP MAC address appears on the underside
of the Smart 116 IP box. The device number (D.N.) can also be found there.
If no DHCP server is found on the network, Smart 116 IP boots with the static IP
address:192.168.0.155.
Note! If a DHCP server later becomes available, the unit picks up the IP settings
from DHCP server. To keep the static IP address, disable DHCP – explained in
section 13.1 on page 15.
11.1 Static IP addresses for a number of units
Where you want to connect more than 1 Smart 116 IP to the same network and
there is no DHCP server, or you want to use static IP addresses, do the following: