


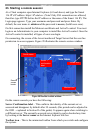

SMART 116 IP
31
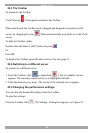
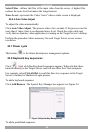
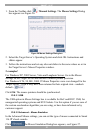
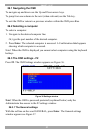
1. From the Toolbar click / Manual Settings. The Mouse Settings Dialog
box appears see Figure 26.
Figure 26 Mouse Settings Dialog box
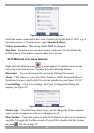
2. Select the Target Server’s Operating System and click OK. Instructions and
sliders appear.
3. Follow the instructions and set any relevant sliders to the same values as set in
the Target Server’s Mouse Properties window.
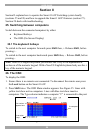
2 examples!
For Windows XP, 2003 Server, Vista and Longhorn Server. Go to the Mouse
settings on the Target Server and uncheck Enhance pointer precision.
For Windows NT4, 98, ME, 2000. If Mouse Properties were ever changed for the
Target Server – even if they have been returned to their original state - uncheck
default - .
Click OK. The mouse pointers should be synchronized.
23.9.3.1 USB
The USB option in Mouse Settings box is available for RoC and RICC USB, for
unsupported operating systems and SUN Solaris. Use this option if you are sure of
the custom acceleration algorithm you are using, or have been informed so by
customer support.
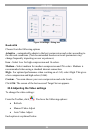
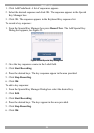
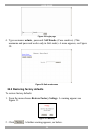
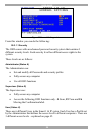
23.9.3.2 Advanced – Mouse Emulation
In the Advanced Mouse settings, you can set the type of mouse connected to Smart
116 IP’s local console.
Click the Mouse Emulation Dialog box appears, see Figure 27.