


Using Floppy Disk, CD-ROM & Tape Drives
4/12 APRICOT 340 OWNER’S HANDBOOK
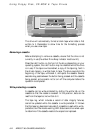
The drive will automatically format a blank tape when data is first
written to it. Remember to allow time for the formatting process
when you use a new tape.
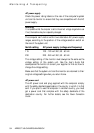
Removing a cassette
Before attempting to remove a cassette, ensure that the drive is not
currently in use (the amber Drive Busy indicator must be unlit).
Press the
EJECT
button on the front of the drive (depending on your
operating system, the
EJECT
button may be disabled while the drive
is in use). If the tape is write-enabled, a copy of the tape log, held in
the drive’s memory, is written back to tape. The drive rewinds to the
beginning of the tape, unthreads it, and ejects the cassette. Several
seconds may pass between the button being pressed and the cassette
being ejected, so be careful not to turn off the computer before the
operation is completed.
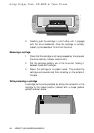
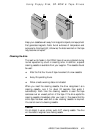
Write-protecting a cassette
A cassette can be write-protected by sliding the white tab on the
cassette so that the recess is revealed. In this position, data can be
read from the tape but not written to it.
The tape log, which includes a record of data integrity failures,
cannot be updated while the cassette is write-protected. It follows
that the tape log becomes inaccurate if a cassette is used while write-
protected, and the media warning LED status cannot be relied upon
to determine if the cassette needs to be copied and replaced.