WiFi-Doc
Via a wireless LAN, you can transfer the images of the
Microsoft PowerPoint, Word, Excel, PDF or TXT format
stored in the tablet computer to the projector and
project them controlling with the tablet computer.
To use WiFi-Doc, you need to install the free software
“WiFi-Doc (Bundle Version)” to the tablet computer.
Supported OS’s of WiFi-Doc (Bundle Version) are as
follows:
• iOS4.2orlater
• Android2.1orlater
Installation of software
1. Download the WiFi-Doc (Bundle Version) from the
Internet to the tablet computer.
• ConnecttoApple Store to download the
software for iOS.
• Connect to Google Play to download the
software for Android .
• ThecommunicationfeetoconnecttoApple
Store or Google Play will be borne by the
customer.
Connection
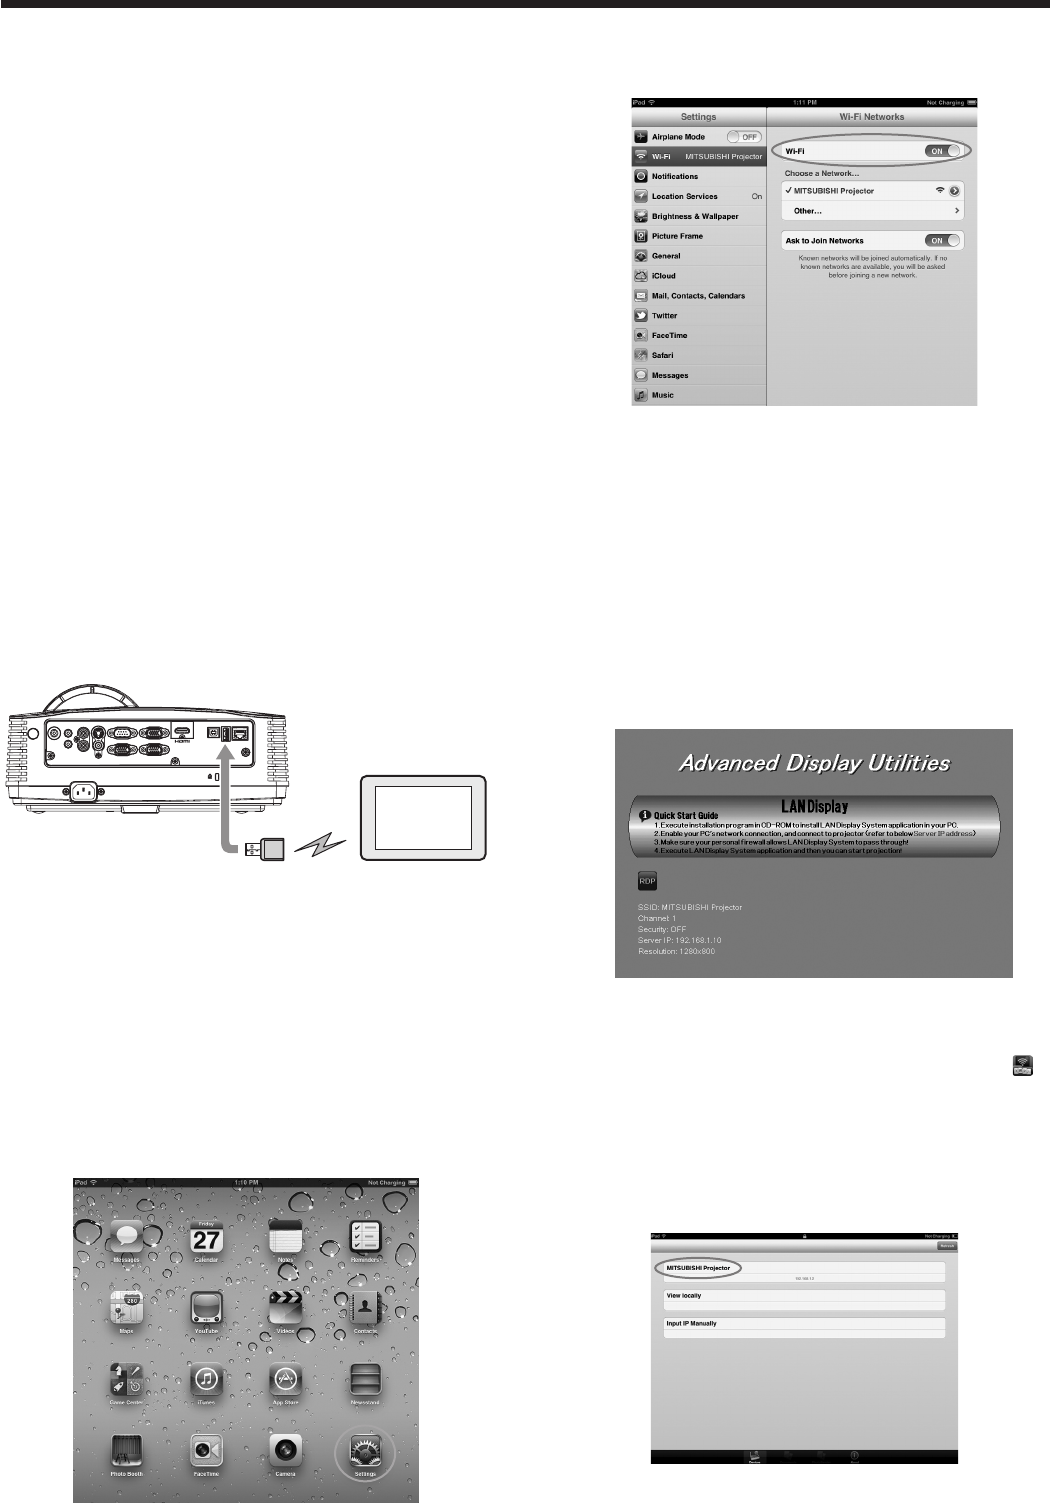
Connect the projector and the tablet computer using a
commercially available USB wireless LAN adapter.
AUDIO OUT
AUDIO IN-3R
VIDEO
MONITOR OUT
IN-2
USB-B
USB-ALAN
IN-1
COMPUTER / COMPONENT VIDEO
SERIAL
S-VIDEO
AUDIO IN-3L
AUDIO
IN-2
AUDIO
IN-1
Tablet computer
USB wireless
LAN adapter
(option)
To USB-A
terminal
Important:
• DonotuseaUSB hub for connection.
• SomeUSBwirelessLANadapterscannotbeused
depending on the specifications.
Wireless network setting on the tablet
computer
1. Turn on the tablet computer and tap the [Settings]
icon.
Advanced display utilities (continued)
2. Turn on Wi-Fi.
• Accesspointswillbelistedonthescreen.
3. Tap the projector’s SSID.
Projection
Selecting a LAN Display input
1. Press the LAN DISP. button on the remote control
or the COMPUTER button on the projector.
• Eachtimeyoupressthe COMPUTER
button, the input source is switched between
Computer1, Computer2, HDMI, LAN Display,
USB Display and PC Less Presentation.
• WhentheLANDisplayinputisselected,the
splash screen for LAN Display appears on the
screen.
Starting WiFi-Doc
When using iOS
2. On the tablet computer, tap the WiFi-Doc icon “ ”
to turn on WiFi-Doc.
• The program starts to search for projectors.
When projectors are found, their SSID’s are
displayed.
3. Select a projector for projection by tapping its
SSID.
