4. Select a file to be projected by tapping its name.
• Theimageoftheselectedleisdisplayed.
5. Operate the image by touching the tablet screen.
• Flickthescreentomovetothepreviousornext
page.
• Pinch the screen for zooming in or out.
• Tap the screen to display the status bar and the
thumbnails of the pages. (See below.)
Thumbnails
Status
bar
• Tap[../Documents]toreturntotheleselection
screen.
• Tap[Play] or [Stop] to start or stop the
projection.
• Tapathumbnailtoselectthepagetobe
projected.
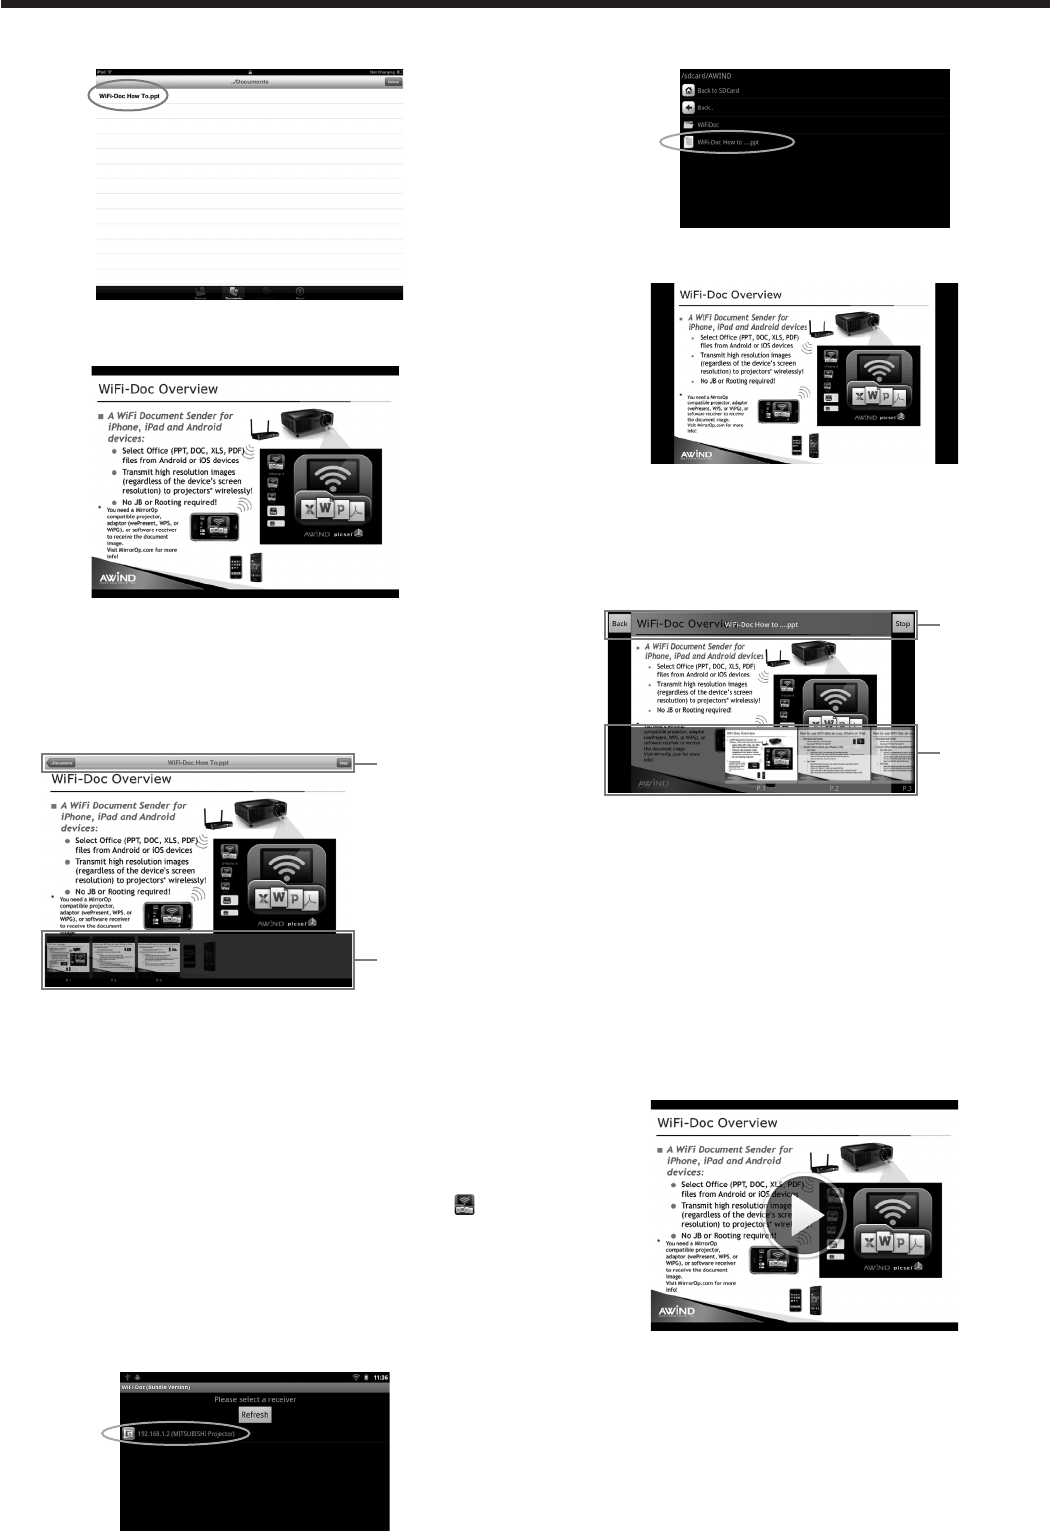
When using Android
2. On the tablet computer, tap the WiFi-Doc icon “ ”
to turn on WiFi-Doc.
• The program starts to search for projectors.
When projectors are found, their SSID’s are
displayed.
3. Select a projector for projection by tapping its
SSID.
4. Select a file to be projected by tapping its name.
• Theimageoftheselectedleisdisplayed.
5. Operate the image by touching the tablet screen.
• Flickthescreentomovetothepreviousornext
page.
• Pinch the screen for zooming in or out.
• Tap the screen to display the status bar and the
thumbnails of the pages. (See below.)
Thumbnails
Status
bar
• Tap[Back]toreturntotheleselectionscreen.
• Tap[Play]or[Stop]tostartorstopthe
projection.
• Tapathumbnailtoselectthepagetobe
projected.
Important:
• Starting projection from another tablet computer
stops the projection from the current tablet
computer and the “” mark will appear in the
middle of the screen. Tapping the “” mark will
start projection from the tablet computer again.
Ending WiFi-Doc
6. Turn off WiFi-Doc on the tablet computer.
Advanced display utilities (continued)


