


System Configuration
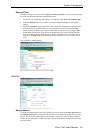
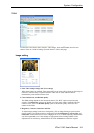
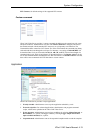
Video
To allow the VPort 2140 to show cameras’ video images, check the Enable item for each
camera. There are 3 kinds of settings for each camera’s video in this page.
Image setting
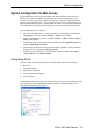
1. Show Time stamp in image and Text on image
When these options are enabled, Time stamp and Text on image will be shown on the image for
reference. The time stamp is captured from the Video Server’s date and time that are
maintained by an on-board real-time clock.
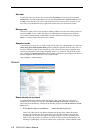
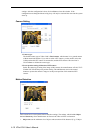
2. Color, Default size, and Default quality
The Color setting depends on the connected camera. The “B/W” option can speed up the
encoder. The Default size option is the default size of the video window when the user first
connects to the VPort. The Default quality option is the default quality when users first
connect to the VPort.
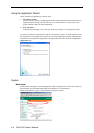
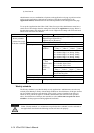
3. Brightness, Contrast, Saturation, and Hue
To adjust image settings for the best visual quality, click on Image Setting to open a motion
picture window. Four fields need to be configured, including Brightness, Contrast, Hue, and
Saturation. Each field has eleven levels, ranging from -5 to +5. While adjusting, administrators
can click on preview to see if the settings are appropriate before clicking on Save. If the
adjustment is not satisfactory, administrators can click on Restore to restore the original
VPort 2140 User’s Manual
4-9