


4-2 Service Manual
24xx
Adjustments
CAUTION: Be sure to unplug the power cord whenever you are
working on the printer with one of the covers removed.
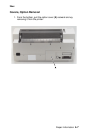
Printhead-to-Platen Gap Adjustment
Perform the printhead-to-platen gap adjustment after replacing the
carrier, platen, lower pinch roller, ribbon drive rack gear, left side
frame, right side frame, paper separator, lower feed roller, or paper
guide.
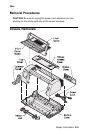
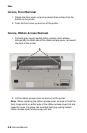
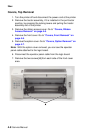
1. Turn the printer off and remove all covers, with the exception of
the bottom cover. See “Covers, Removals” on page 4-5.
2. Remove the ribbon cartridge and paper.
3. Remove the Lock Tite (red) from the gap adjust bushings on
both the left and right side of the printer.
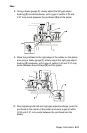
4. Set the form thickness lever to position 1, by pushing it toward
the back of the printer as far as it will go.
5. Move the printhead to the left edge of the rubber on the platen.
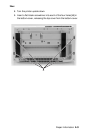
6. Shift the left gap adjust bushing clockwise as far as it will go.
7. Shift the right gap adjust bushing counterclockwise as far as it
will go.
Note: At this time, the nose of the printhead should be touching the
platen.