29
Getting Started
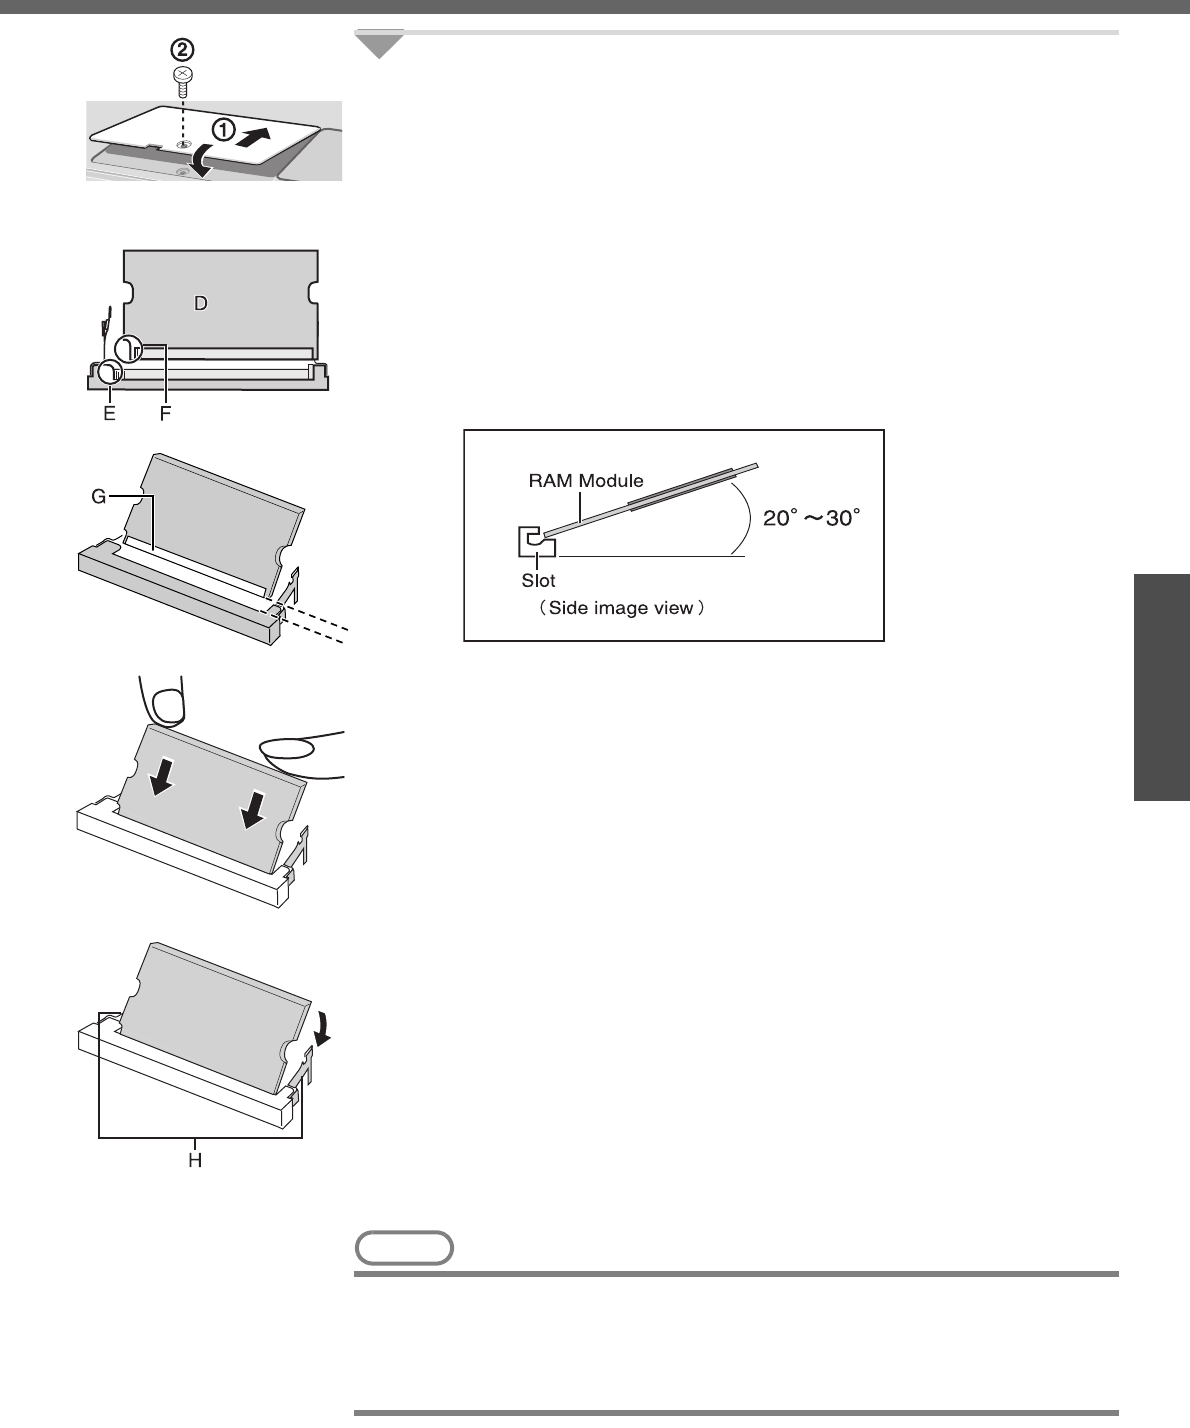
4 Put the cover back in place.
A Insert the cover at an angle, then fit it into place.
B Fasten the screw.
Inserting
After making the settings in step 1 to 2 of “Removing”, insert the RAM module as fol-
lows.
A Check direction of a RAM module (D).
Hold the RAM module in the direction that the notch (F) of the RAM
module suits to the protrusion (E) of the slot.
B Place the RAM module lightly in parallel with a slot.
(The gold terminals (G) are visible)
C Insert the module parallel to the slot and press firmly until the gold termi-
nals are no longer visible.
z If the RAM module is difficult to insert, do not force it. Check once more
to ensure that the module is positioned correctly.
z The slot may be damaged if the following procedure is performed with-
out inserting the module firmly.
D Press the RAM module down until the right and left hooks (H) lock into
place.
z When pressing down the module, the right and left hooks will open
slightly and will return after locking.
z If the RAM module is difficult to press down, do not force it. Check once
more to ensure that the module is positioned correctly.
E Put the cover back in place.
Refer to step 4 of “
Removing”.
NOTE
z The memory size in [Information] menu of the Setup Utility (Î page 31) has
increased if the RAM module has been recognized.
If the RAM module is not recognized, power off the computer and insert it again.
Refer to the main memory in the specifications to check the memory size at the
time of shipment. (Î page 62)


