


4. Scanner
30
L The e-mail software will automatically start and
the scanned image will be attached to a new e-
mail message.
Note:
L To select the default E-mail software, see page 24.
L To stop scanning, see page 65.
L You can save the images in JPEG or PDF formats.
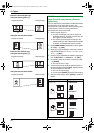
To send the scanned image via e-mail server (LAN
connection only)
You can send the scanned image as an attachment
without using e-mail software. To select the e-mail
destination easily, register e-mail addresses using the
web browser beforehand (page 60).
Important:
L Program the SMTP server setting beforehand
(see page 63).
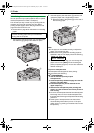
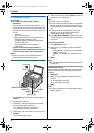
1. Set the original (page 17).
2. {SCAN}
3. Press {V} or {^} repeatedly to select “E-MAIL”. i
{SET}
4. Press {V} or {^} repeatedly to select “E-MAIL
SERVER”. i {SET}
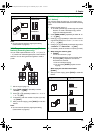
5. Enter the destination e-mail address.
Using stations 1-7:
Press the desired station key.
Using stations 8-14:
Press {LOWER}, then press the desired station key.
Using navigator key:
Press {V} or {^} repeatedly to select the desired
destination.
Using dial keypad:
Press {SET}, then enter the e-mail address using the
dial keypad (page 64).
6. {SET}
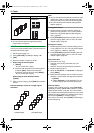
7. If necessary, change the scanning settings. Press
{>}, press {V} or {^} repeatedly to select the desired
setting. i {SET} i {START}
Note:
L If you select black/white for the scan type, you can
save the images in TIFF or PDF formats.
If you select grayscale or color for the scan type, you
can save the images in JPEG or PDF formats.
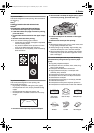
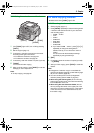
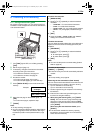
4.1.4 Scan to OCR
With OCR software, you can convert an image into text
data that can be edited with word processor software.
Readiris OCR software can be installed when installing
Multi-Function Station.
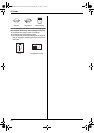
1 Set the original (page 17).
2 {SCAN}
3 Press {V} or {^} repeatedly to select “OCR”. i
{SET}
4 For USB connection:
Press {V} or {^} repeatedly to select “USB HOST”.
i {SET}
For LAN connection:
Press {V} or {^} repeatedly to select the computer
that you want to send the scanned image. i {SET}
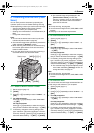
5 If necessary, change the scanning settings (scan
type / resolution / file format / brightness / contrast /
scan size). Press {>}, press {V} or {^} repeatedly to
select the desired setting. i {SET} i {START}
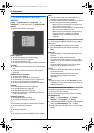
L The scanned image will be displayed in the OCR
window after scanning.
Note:
L You can save the images in TIFF, JPEG or BMP
formats.
L For detailed instructions about OCR, select [Help].
FLB881-PFQX2732ZA-OI-en.book Page 30 Wednesday, July 18, 2007 11:22 PM