


Maintenance and Repair
to the charger and insert it into the charge socket that is just below your robot’s Main
Power switch. The LEDs on the charger indicate charge status, as marked on its case.
It takes fewer than 12 hours—often just a few hours, depending on the level of
discharge—to fully charge a battery using the accompanying charger (roughly, three
hours per volt per battery). Although you may operate the robot while recharging, it
restricts the robot’s mobility.
Automated Docking/Charging System
The automated docking/charging system accessory optimally conditions power to
charge the three 21-Ahr, 12 VDC lead-acid batteries (6 A charging current max) and
provides sufficient power (up to 5A) for operation of all onboard systems.
The charging mechanism and onboard power conditioning circuitry can be retrofitted to
all Pioneer 3 and some Pioneer 2 and PeopleBot robots. All require return to the factory.
Alternative Battery Chargers
The center post of the charger socket is the positive (+) side of the battery; the case is the
negative (-) side. A diode protects against the wrong charger polarity. Nonetheless, if
you choose to use an alternative battery charger, be sure to connect positive to positive
and negative to negative from charger to robot.
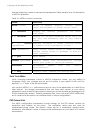
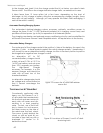
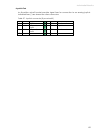
Figure 19. Loosen the AT drive belt retainer
screws first.
An alternative AC to DC
converter/battery charger should
sustain at least 0.75A at 13.75 to
14 VDC per battery, and not more
than 2-2.5 amperes per battery.
The High-Speed Charger
accessory, for example, is a four
ampere charger and should be
used with at least two of the
standard batteries.
An alternative charger also should
be voltage-and current-limited so
that it cannot overcharge the
batteries.
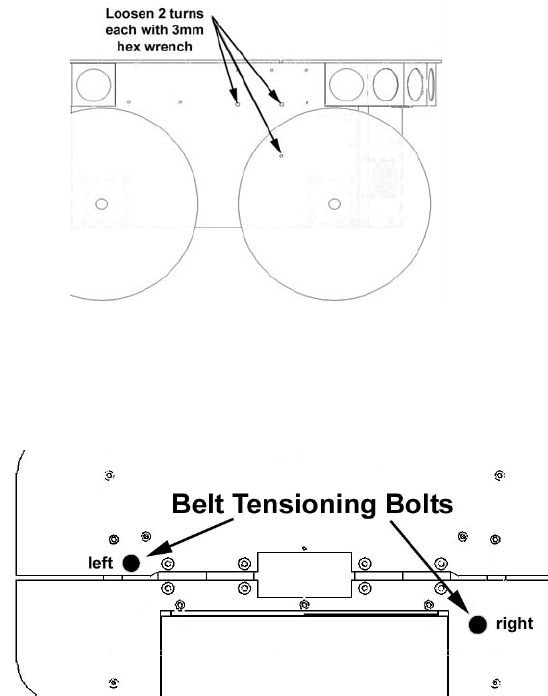
TIGHTENING THE AT DRIVE BELT
Occasionally, particularly after
heavy use, the Pioneer 3- or 2-
AT drive belts that mechanically
link the front and rear motors on
each side will loosen and slip,
resulting in a load popping
noise. To start, use a 3mm hex
key to loosen, but not remove,
the three screws on the side of
the robot near the front wheel.
One screw is partly behind the
wheel, so with our parts kit, we
included a 3mm hex key with a
shortened “L” section to fit
behind the wheel.
Figure 20. Locations of Pioneer 2- and 3-AT's belt-
tensioning bolts
62