


Vess A2600 Quick Installation Guide
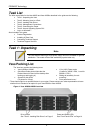
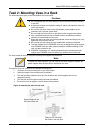
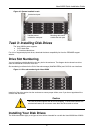
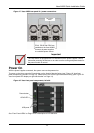
Figure 10: System installed in rack
Verti
cal rack post
Handles mount
outside the rack post
Mounting rails mount
outside the rack post
Task 3: Installing Disk Drives
The Vess A2600 system supports:
SATA hard disks
3.5-inch hard disk drives
For a list of supported physical drives, download the latest compatibility list from the PROMISE support
website.
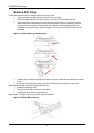
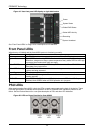
Drive Slot Numbering
You can install any suitable disk drive into any slot in the enclosure. The diagram be-low shows how drive
slots are numbered on both the Vess and.
Slot numbering is reflected in the GUI of the web manager (WebPAM PROe) and CLI/CLU user interfaces.
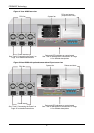
Figure 11: Drive slot numbering for Vess A2600
Install all of the drive carriers into the enclosure to ensure proper airflow, even if you do not populate all the
carriers with disk drives.
Caution
The Vess A-Series supports disk drive hot-swapping. To avoid hand contact with
an electrical hazard, do not remove more than one drive carrier at a time.
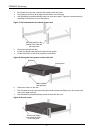
Installing Your Disk Drives
The instructions below apply to all types of drive carriers intended for use with the Vess A2600/Vess V2600s.
9