Vess A2600 Quick Installation Guide
Task 2: Mounting Vess in a Rack
The instructions here apply to the Vess A2600s and Vess A2600.
Cautions
●
Do not populate any unit with hard drives until it has been securely installed
in the rack.
●
At least two persons are required to safely lift, place, and attach the Vess unit
into a rack system.
●
Do not lift or move the Vess unit by the handles, power supplies or the
controller units. Hold the system itself.
●
Do not install the Vess unit into a rack without rails to support the system.
●
Only a qualified technician who is familiar with the installation procedure
should mount and install the Vess unit.
●
Mount the rails to the rack using the appropriate screws and flange nuts, fully
tightened, at each end of the rail.
●
Do not load the rails unless they are installed with screws as instructed.
●
The rails available for the PROMISE Vess unit are designed to safely support
that PROMISE Vess unit when properly installed. Additional loading on the
rails is at the customer’s risk.
●
PROMISE Technology, Inc. cannot guarantee that the mounting rails will
support your PROMISE Vess unit unless you install them as instructed.
The Vess installs to the rack using the mounting rails shipped with the device.
Note
To lighten the Vess enclosure, you can remove the power supplies. Replace the
power supplies after the Vess unit is mounted in your rack.
To install the Vess into a rack with the supplied mounting rails:
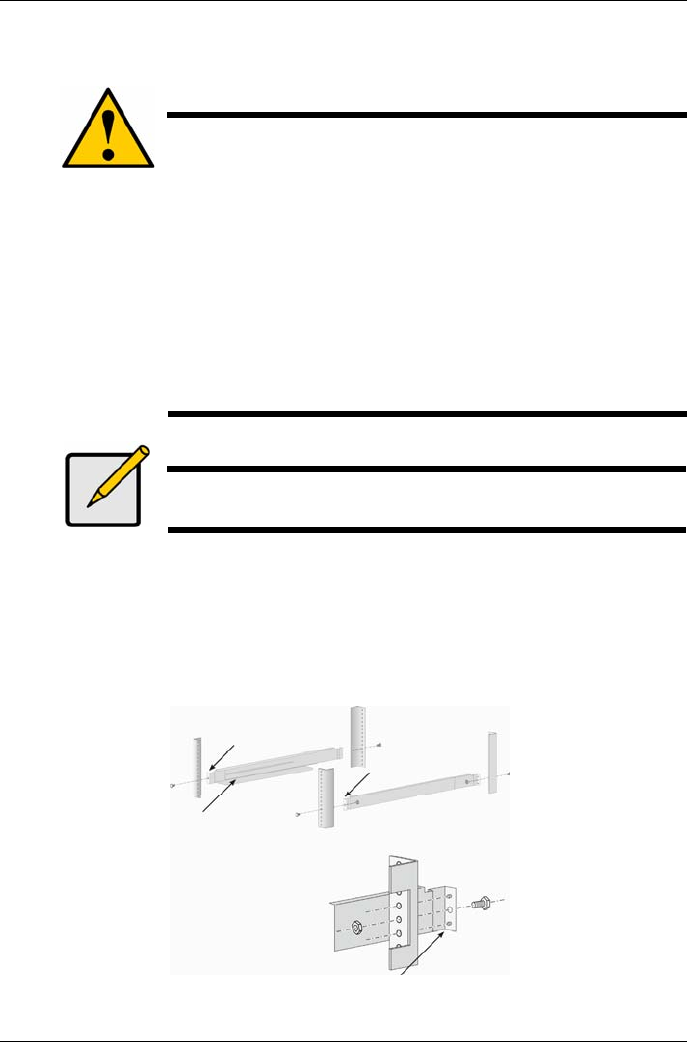
1. Check the fit of the mounting rails in your rack system.
2. Adjust the length of the mounting rails as needed.
The rear rail slides inside the front rail. The rail halves are riveted together and use no
adjustment screws.
The front-left and front-right mounting rail ends are labeled.
Be sure the front rail support is on the bottom facing inward.
Figure 6: Installing the rails onto the rack
Front left label
Front right label
Support flange on the
front end of each rail
Guide pins on rails align
with holes in the rack post
7


