


Vess A2600 Quick Installation Guide
11
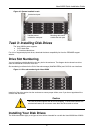
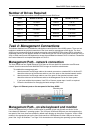
Number of Drives Required
The table below shows the number of drives required for each RAID level
Level Number of Drives Level Number of Drives
RAID 0 1 or more RAID 6 4 to 32
RAID 1 2 only RAID 10 4 or more*
RAID 1E 2 or more RAID 30 6 or more
RAID 3 3 to 32 RAID 50 6 or more
RAID 5 3 to 32 RAID 60 8 or more
* Must be an even number of drives.
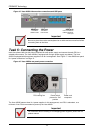
Task 4: Management Connections
This section describes how to establish a management connection the Vess A2600 system. There are two
methods to establish the physical connection to the Vess used for management of the device. The Vess
A2600 can be managed through the network connection using WebPAM PROe (where PROe ‘e’stands for
embedded manner), a web browser based GUI. Alternatively you can use an out-of-band connection using a
VGA or HDMI monitor and USB keyboard to access the embedded text-based CLI/CLU interface. Please see
the Product Manual for a complete description of CLI/CLU.
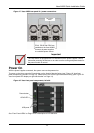
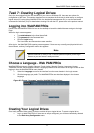
Management Path - network connection
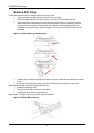
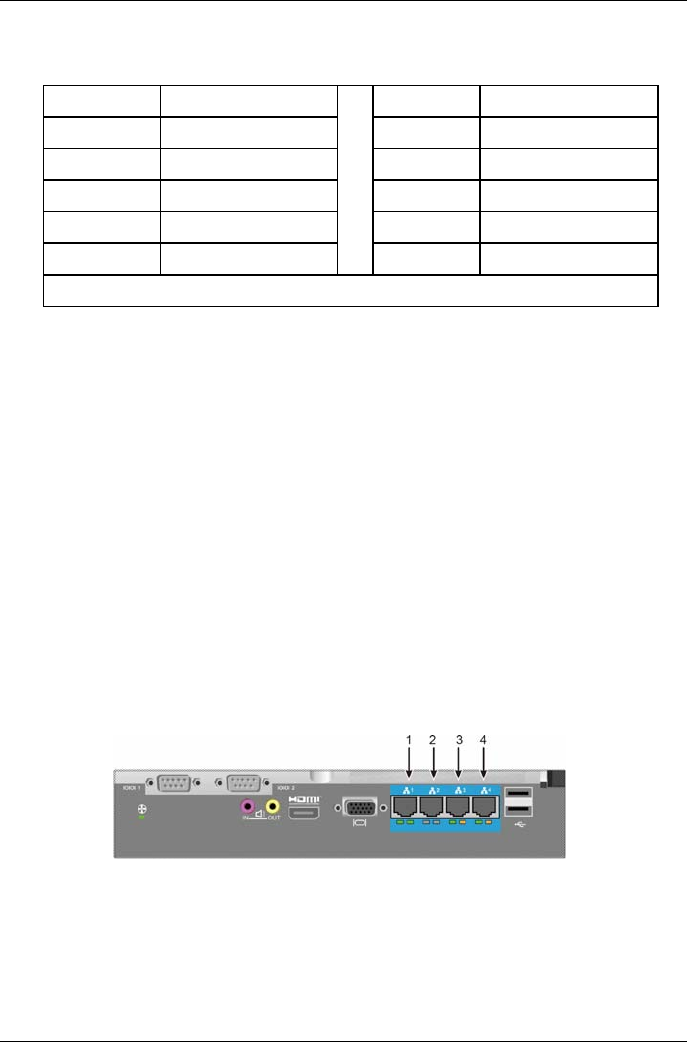
The Vess A2600 has four Gigabit Ethernet RJ-45 ports on the rear panel for connection to an Ethernet
network. Use this connection with WebPAM PROe to login as the device administrator.
To establish the management path:
1. Attach one end of an Ethernet cable to the network connector or standard NIC in the Host PC.
Attach the other end of the Ethernet cable to one of the ports on the standard network switch.
2. Attach one end of an Ethernet cable to one of the ports on the standard net-work switch.
Attach the other end of the Ethernet cable to the Management Port on the Vess system.
If you have multiple Vess systems, Host PCs or Servers, repeat steps 1 and 2 as required.
3. Follow the instructions for managing the basic settings of the Vess.
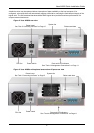
Figure 14: Ethernet ports on the rear panel of the Vess A2600
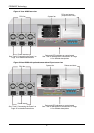
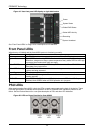
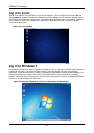
Management Path - on site keyboard and monitor
Use a USB keyboard and a VGA or HDMI monitor to establish a local out-of-band con-nection to the
Linux-based or Windows 7 operating system. The VGA port, HDMI and USB ports are also located on the
rear panel of the Vess, these are enabled by default upon booting up the system. Connect a VGA or HDMI
monitor to the appropriate port on the Vess, and connect a USB keyboard to either USB port on the rear
panel. See “Log in to Windows 7” on Page 16 for instructions on accessing the operating sys-tem interface.
Ethernet
p
orts