


Vess A2600 Quick Installation Guide
1. Remove the controller module and place it on a desktop or suitable work area.
2. Remove the fan module and a punch-out cover for the slot where the PCIe card can be accessed
from the backplate of the Vess controller.
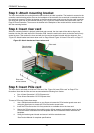
3. Attach the mounting bracket included with the riser card shipment.
4. Insert the riser card and secure it to the mounting bracket.
5. Loosen and open the PCIe bracket guard
6. Insert a PCIe card and secure it to the controller housing.
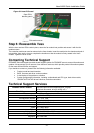
7. Close and tighten the PCIe bracket guard, replace the fan module and re-place the controller
module in the Vess system chassis.
Step 1: Remove controller module
To remove the controller module of the Vess A2600 or Vess A2600s:
1. Power off the Vess system and wait until it is completely shut down. Discon-nect all power cords.
2. Use a Phillips head screwdriver or your fingers to loosen the screw that se-cures the lever used
to remove and insert the controller, then pull the lever out so that the controller is unseated from
the Vess chassis.
3. Pull the controller module straight back and out of the Vess chassis.
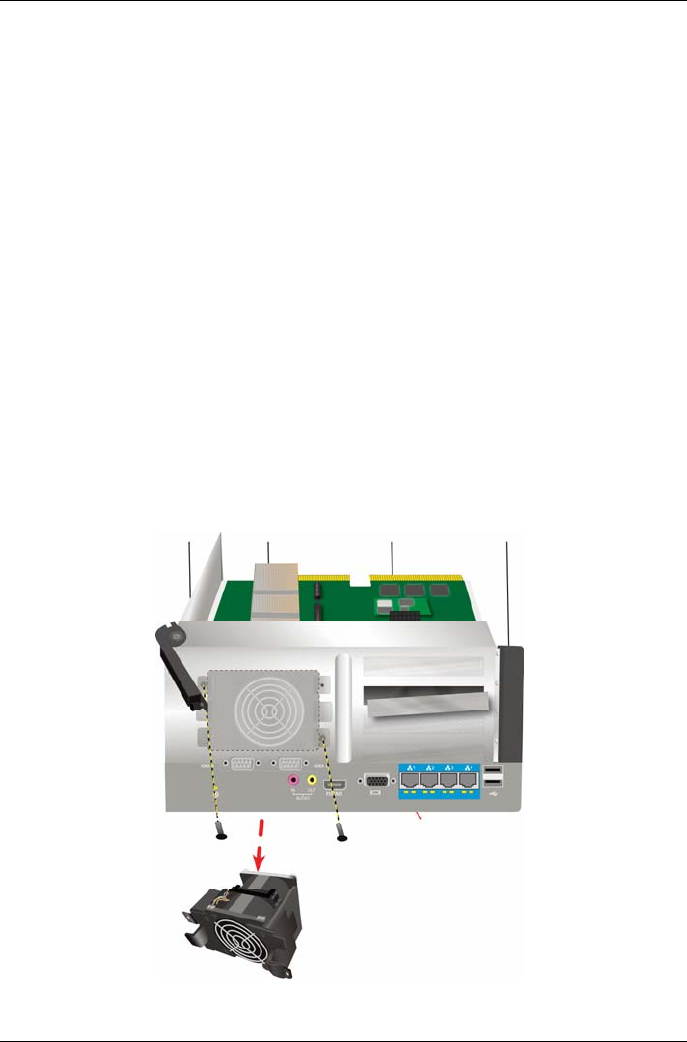
Step 2: Remove fan module
To remove the fan module from the controller:
1. Use a Phillips head screwdriver to remove the two screw that secure the fan, one screw is in the
upper left corner, the other in the lower right corner of the module.
2. Pull the fan module out of the controller.
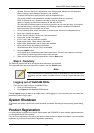
Figure 32: Vess A2600 controller module - remove fan
Fan module mounted
in controller unit
Backplate access
and punch-out cover
for PCIe card
PCIe bracket guard
Riser bracket anchor
screw hole
Controller
removal lever
Fan module removed
from controller
25