


SmartStor NS4300N Quick Start Guide
8
Step 7: Setting up the SmartStor
The NAS Setup Wizard performs the setup procedures on your SmartStor. After
the procedure is done, you will have a default folder on the SmartStor, set up as a
network drive on your PC.
To set up your SmartStor:
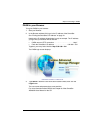
1. From the Windows Start menu, choose
Programs
, then
Promise NAS Utility
,
and then
NAS Setup Wizard
.
The NAS Setup Wizard welcome screen appears.
2. From the Choosing a language dropdown menu, choose the language you
prefer.
3. Choose an Initiation Mode.
Click the
Express Mode
option if ALL of these conditions apply:
• You have a DHCP server on your network with addresses available.
• You want data protection for your RAID Volume.
• You want to use date and time settings from your PC.
Click the
Advanced Mode
option if one or more of these conditions apply:
• You do not have a DHCP server on your network.
• You have a DHCP server but no addresses are available.
• You want to set the IP address manually.
• You want maximum capacity RAID 0 Volume.
• You want to set date and time manually.
The rest of the setup instructions describe Express mode. For setup
instructions using Advanced mode, see Appendix A of the
SmartStor
NS4300N User Manual
on the CD.
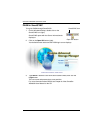
4. Click Next >> to continue.
The Discovering Promise NAS screen appears.
5. Highlight the SmartStor you are initiating, then click Next >> to continue.
The Login dialog box appears.
6. Type admin into the Password field, then click OK.
The password is case sensitive.
The Select a Device Name screen appears.
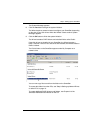
7. Select a Device Name (drive letter) to represent the default folder on the
SmartStor as a network drive on your PC.
The list begins with Z and goes in reverse alphabetical order.
Click Next >> to continue.