


ASMi-450 Installation and Operation Manual Quick-Start Guide - 1
Quick-Start Guide
If you are familiar with HDSL transmission equipment, use this guide to prepare
(configure) an ASMi-450 for operation. The configuration activities can be
carried out either before or after the ASMi-450 is installed in its intended
location.
1. Starting the Configuration
Preliminary
Preparations
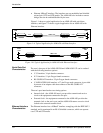
To configure the ASMi-450, you need an ASCII terminal, e.g., a VT-100, etc.,
or a PC running a terminal emulation program. You also need a standard cable
terminated in a 9-pin D-type male connector, for connecting the serial port of
your terminal to the CONTROL DCE connector located on the front panel of the
ASMi-450.
Configure your terminal for eight data bits, no parity, one stop bit, echo off, and
no flow control. You can use 300, 1200, 2400, 4800, or 9600 bps - the
ASMi-450 will automatically recognize the data rate you are using.
Starting Procedure
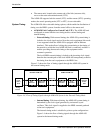
1. Turn the ASMi-450 on.
2. Connect the terminal cable to the CONTROL DCE connector of the
ASMi-450.
3. Press the Carriage Return (<CR> or ENTER) key three times in sequence:
you should see the ASMi-450 prompt, ASMI>
.
If you see PASSWORD>, type ASMI and then press <CR> to obtain the prompt.
If you do not see the prompt:
• Check the terminal configuration, and its connections to the ASMi-450, and
then repeat step 3 above.
• Turn the ASMi-450 off about 15 seconds, and then turn it on again and
repeat step 3 above.
• If this is the first time you are working on this ASMi-450 unit, refer to
Section 4-3 for preliminary configuration instructions.
• Read ASMi-450 display. If the second row shows EMPTY, everything is
OK. If it shows SCROLL, press SCROLL and read the alarm messages.
Refer to Chapter 5 for instructions.