Other Print Operations
98
3
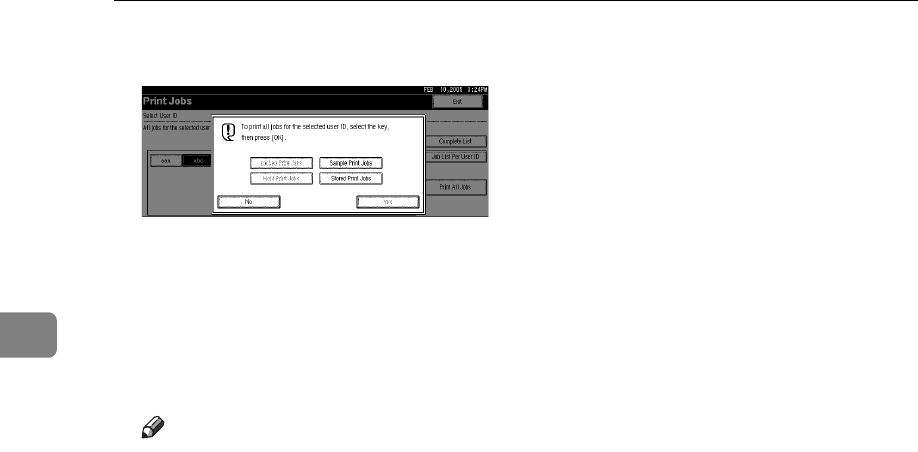
E Select the desired print job type, and then press [OK].
The confirmation screen appears.
The confirmation screen does not appear if the selected ID has only one type
of print jobs.
F Press [Yes].
The selected files are printed.
Note
❒ After printing is completed, Sample Print, Locked Print, and Hold Print
files are deleted.
❒ You cannot select a print job that is not stored under the selected user ID.
❒ If you select multiple Sample Print Files and do not specify the number of
sets on the confirmation screen, one set less than the smallest number spec-
ified on the computer is printed for every selected document. If the small-
est number of sets specified on the computer is “1”, one set each is printed
for every document.
❒ If you select Stored Print, the number you set on the confirmation screen is
applied to all files of the selected print job type. If you do not set a quantity,
the minimum number is applied to all files.
❒ If you select Locked Print, enter the correct password. If there are multiple
passwords, the machine prints only files that correspond to the entered
password.
❒ If you select Stored Print files, and some of these require a password, the
machine prints files that correspond to the entered password and files that
do not require a password.
❒ The confirmation screen displays the total number of files of the selected
user ID to be printed.


