


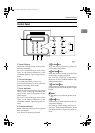
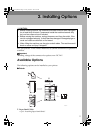


Installing Options
17
2
F
FF
F
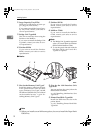
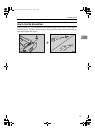
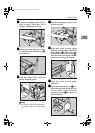
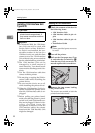
Pull the second paper tray (Tray 2)
until it stops. After that, lift it
slightly, and then pull it out.
G
GG
G
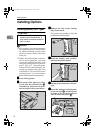
Pull out the first paper tray (Tray
1) , and take the screwdriver (A
AA
A)
from the tray.
H
HH
H
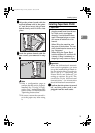
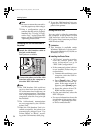
Lock the Paper Bank and the
printer with the screw.
Note
❒ Be sure to return the screwdriv-
er to the paper tray after using
it.
I
II
I
Set the second paper tray (Tray 2)
into the printer.
J
JJ
J
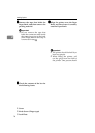
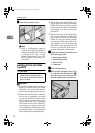
Open the lower vertical paper
feed cover on the right side of the
Paper Bank (A
AA
A). Hang the lock
plate hook in the hole inside (B
BB
B),
and then fasten the plate with the
knob screw using your fingers.
K
KK
K
Close the lower vertical paper
feed cover.
L
LL
L
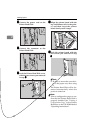
Open the connector cover (B
BB
B), re-
move the tape that holds the con-
nector cable and attach the
connector cables (C
CC
C) as shown in
the illustration.
ZFCP720E
TAPH221E
TAPP050E
Setup-F3_FM.book Page 17 Friday, October 5, 2001 8:27 PM