Installing Options
19
2
D
DD
D
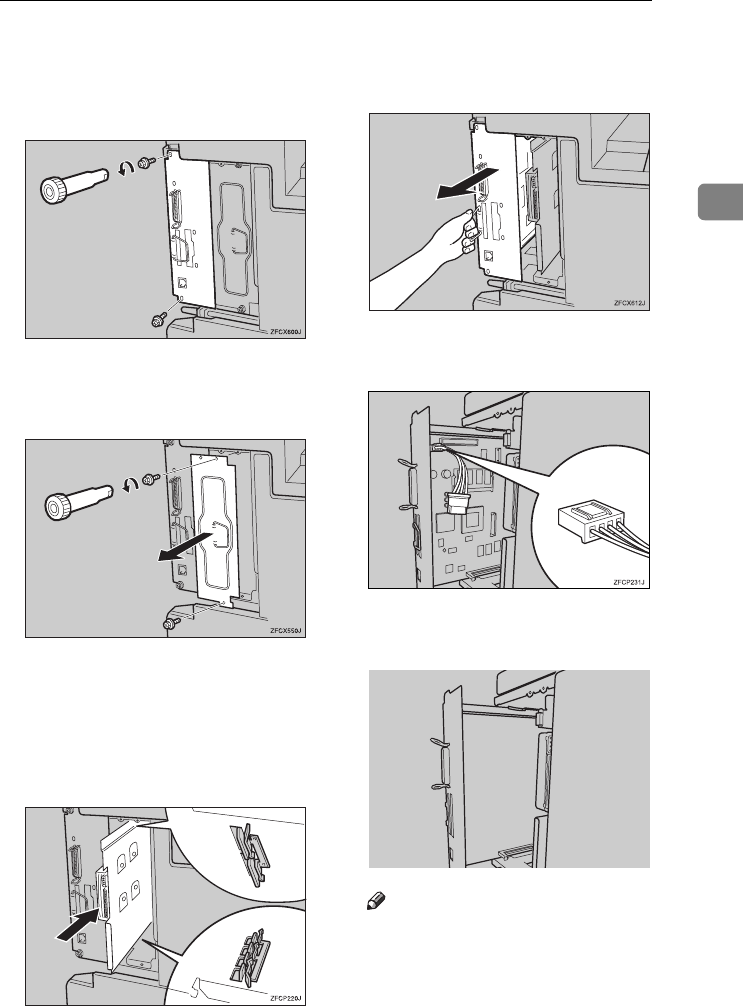
Remove the two screws locking
the printer board.
The screws are needed to lock the
printer board afterwards.
E
EE
E
Remove the two screws locking
the Printer Hard Disk cover next
to the printer board.
The screws are needed to lock the
cover afterwards.
F
FF
F
Align the Printer Hard Disk with
the top and bottom rails , and then
insert the Printer Hard Disk slow-
ly until it stops.
G
GG
G
Hold the handle, and carefully
pull out the printer board half-
way.
H
HH
H
Connect the bigger plug of the
power cord to the printer board.
I
II
I
Connect the connector to the
printer board.
Note
❒ Connect either side of the con-
nector.


