Installing Options
22
2
Installing 1394 Interface Unit
Type 4510
CAUTION:
Important
❒ In Windows 2000, the 1394 Inter-
face Unit can only be used with
Service Pack 1 or later. If the Serv-
ice Pack is not installed, the con-
nectable number of devices in a
1394 bus is only one, and the client
cannot access the 1394 Interface
Unit without using an account that
has the administrators permission.
❒ The 1394 Interface Unit can be
damaged by a small amount of
static electricity. You should touch
some metal to discharge static elec-
tricity.
❒ Use the 1394 interface cable that
comes with this printer.
❒ Do not plug or unplug the 1394 in-
terface cable while installing the
printer driver.
❒ Do not turn the device on or off,
while installing the printer driver.
❒ When the 1394 Interface Unit is in-
stalled, uninstall the printer driver
after the 1394 interface cable is un-
plugged.
❒ Before pulling out printer board,
make sure that the printer’s power
switch is off, and 1394 interface ca-
bles are unplugged. If there is elec-
tricity provided from the
equipment connected with the
1393 interface cables, the printer
board and the 1394 Interface Unit
might be damaged.
Installing the 1394 Interface Unit
A
AA
A
Check the contents of the box for
the following items:
• 1394 Interface Unit
• 1394 interface cable (6–pin x 4–
pin)
• 1394 interface cable (6–pin x 6–
pin)
• Installation Guide
Note
❒ Other provided parts are not to
be used.
B
BB
B
Turn off the printer.
C
CC
C
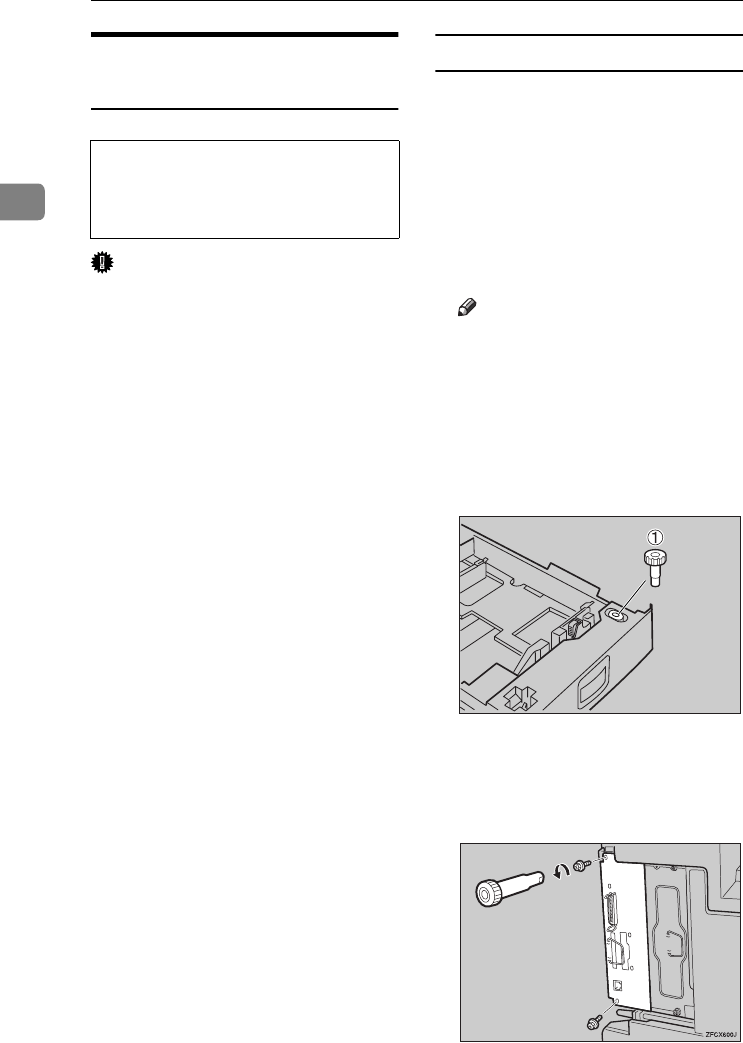
Pull out the first paper tray (Tray
1) and take the screwdriver (A
AA
A)
from the tray. Each screw to be re-
moved requires this screwdriver.
D
DD
D
Remove the two screws locking
the printer board.
The screws are needed to lock the
printer board afterwards.
• Do not touch the inside of the
printer board compartment. It
may cause a machine malfunc-
tion or a burn.
ZFCP720E
Setup-F3_FM.book Page 22 Friday, October 5, 2001 8:27 PM


