


29
2 Basic Operation
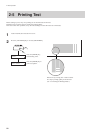
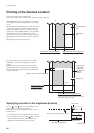
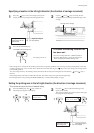
Specifying a location in the left-right direction (the direction of carriage movement)
Setting the printing area in the left-right direction (the direction of carriage movement)
* This can be set only at the time of material setup.
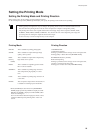
Press the [MENU] key and [ ] key to make the
following screen appear on the display.
1
MENU
PRINT AREA
Press the [ ] key to make the following screen
appear on the display.
The carriage indicates the present location of the right-
hand edge of the printing area.
2
PRINT AREA
MOVE TO R-EDGE
Right-hand edge of
the printing area
Right-hand edge of
the material
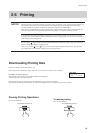
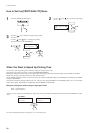
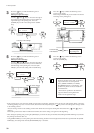
Press the [ ] key to move the carriage to the present
starting location for printing in the left-right direction.
1
Starting location for
printing in the left and
right direction
Right-hand edge of
the material
Use the [ ] and [ ] keys to line up the new
starting location for printing with the left edge of the
carriage.
2
Left edge of the carriage
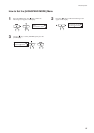
Press the [BASE POINT] key.
3
The BASE POINT LED lights up
The origin point is set.
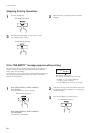
To release the starting location that
has been set...
• Set a new starting location in a different location.
• Press the [SETUP] key to cancel the setup for the
material (making the SETUP LED go out).
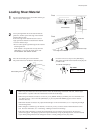
- If the carriage moves away from the standby position when not printing, problems such as drying-out of the printing heads or dot drop-
out during printing may occur. For this reason, about 60 seconds after pressing the [
] key to move the carriage, the carriage returns
to the standby position.
Also, the carriage returns to the standby position when about 20 seconds passes during this interval after the [
] and [ ] key is
released.
If the setting could not be made in within the time limit, then do the setting over again from the beginning.
- The starting location set by pressing the [BASE POINT] key is released after printing one page.